egg and chive potstickers

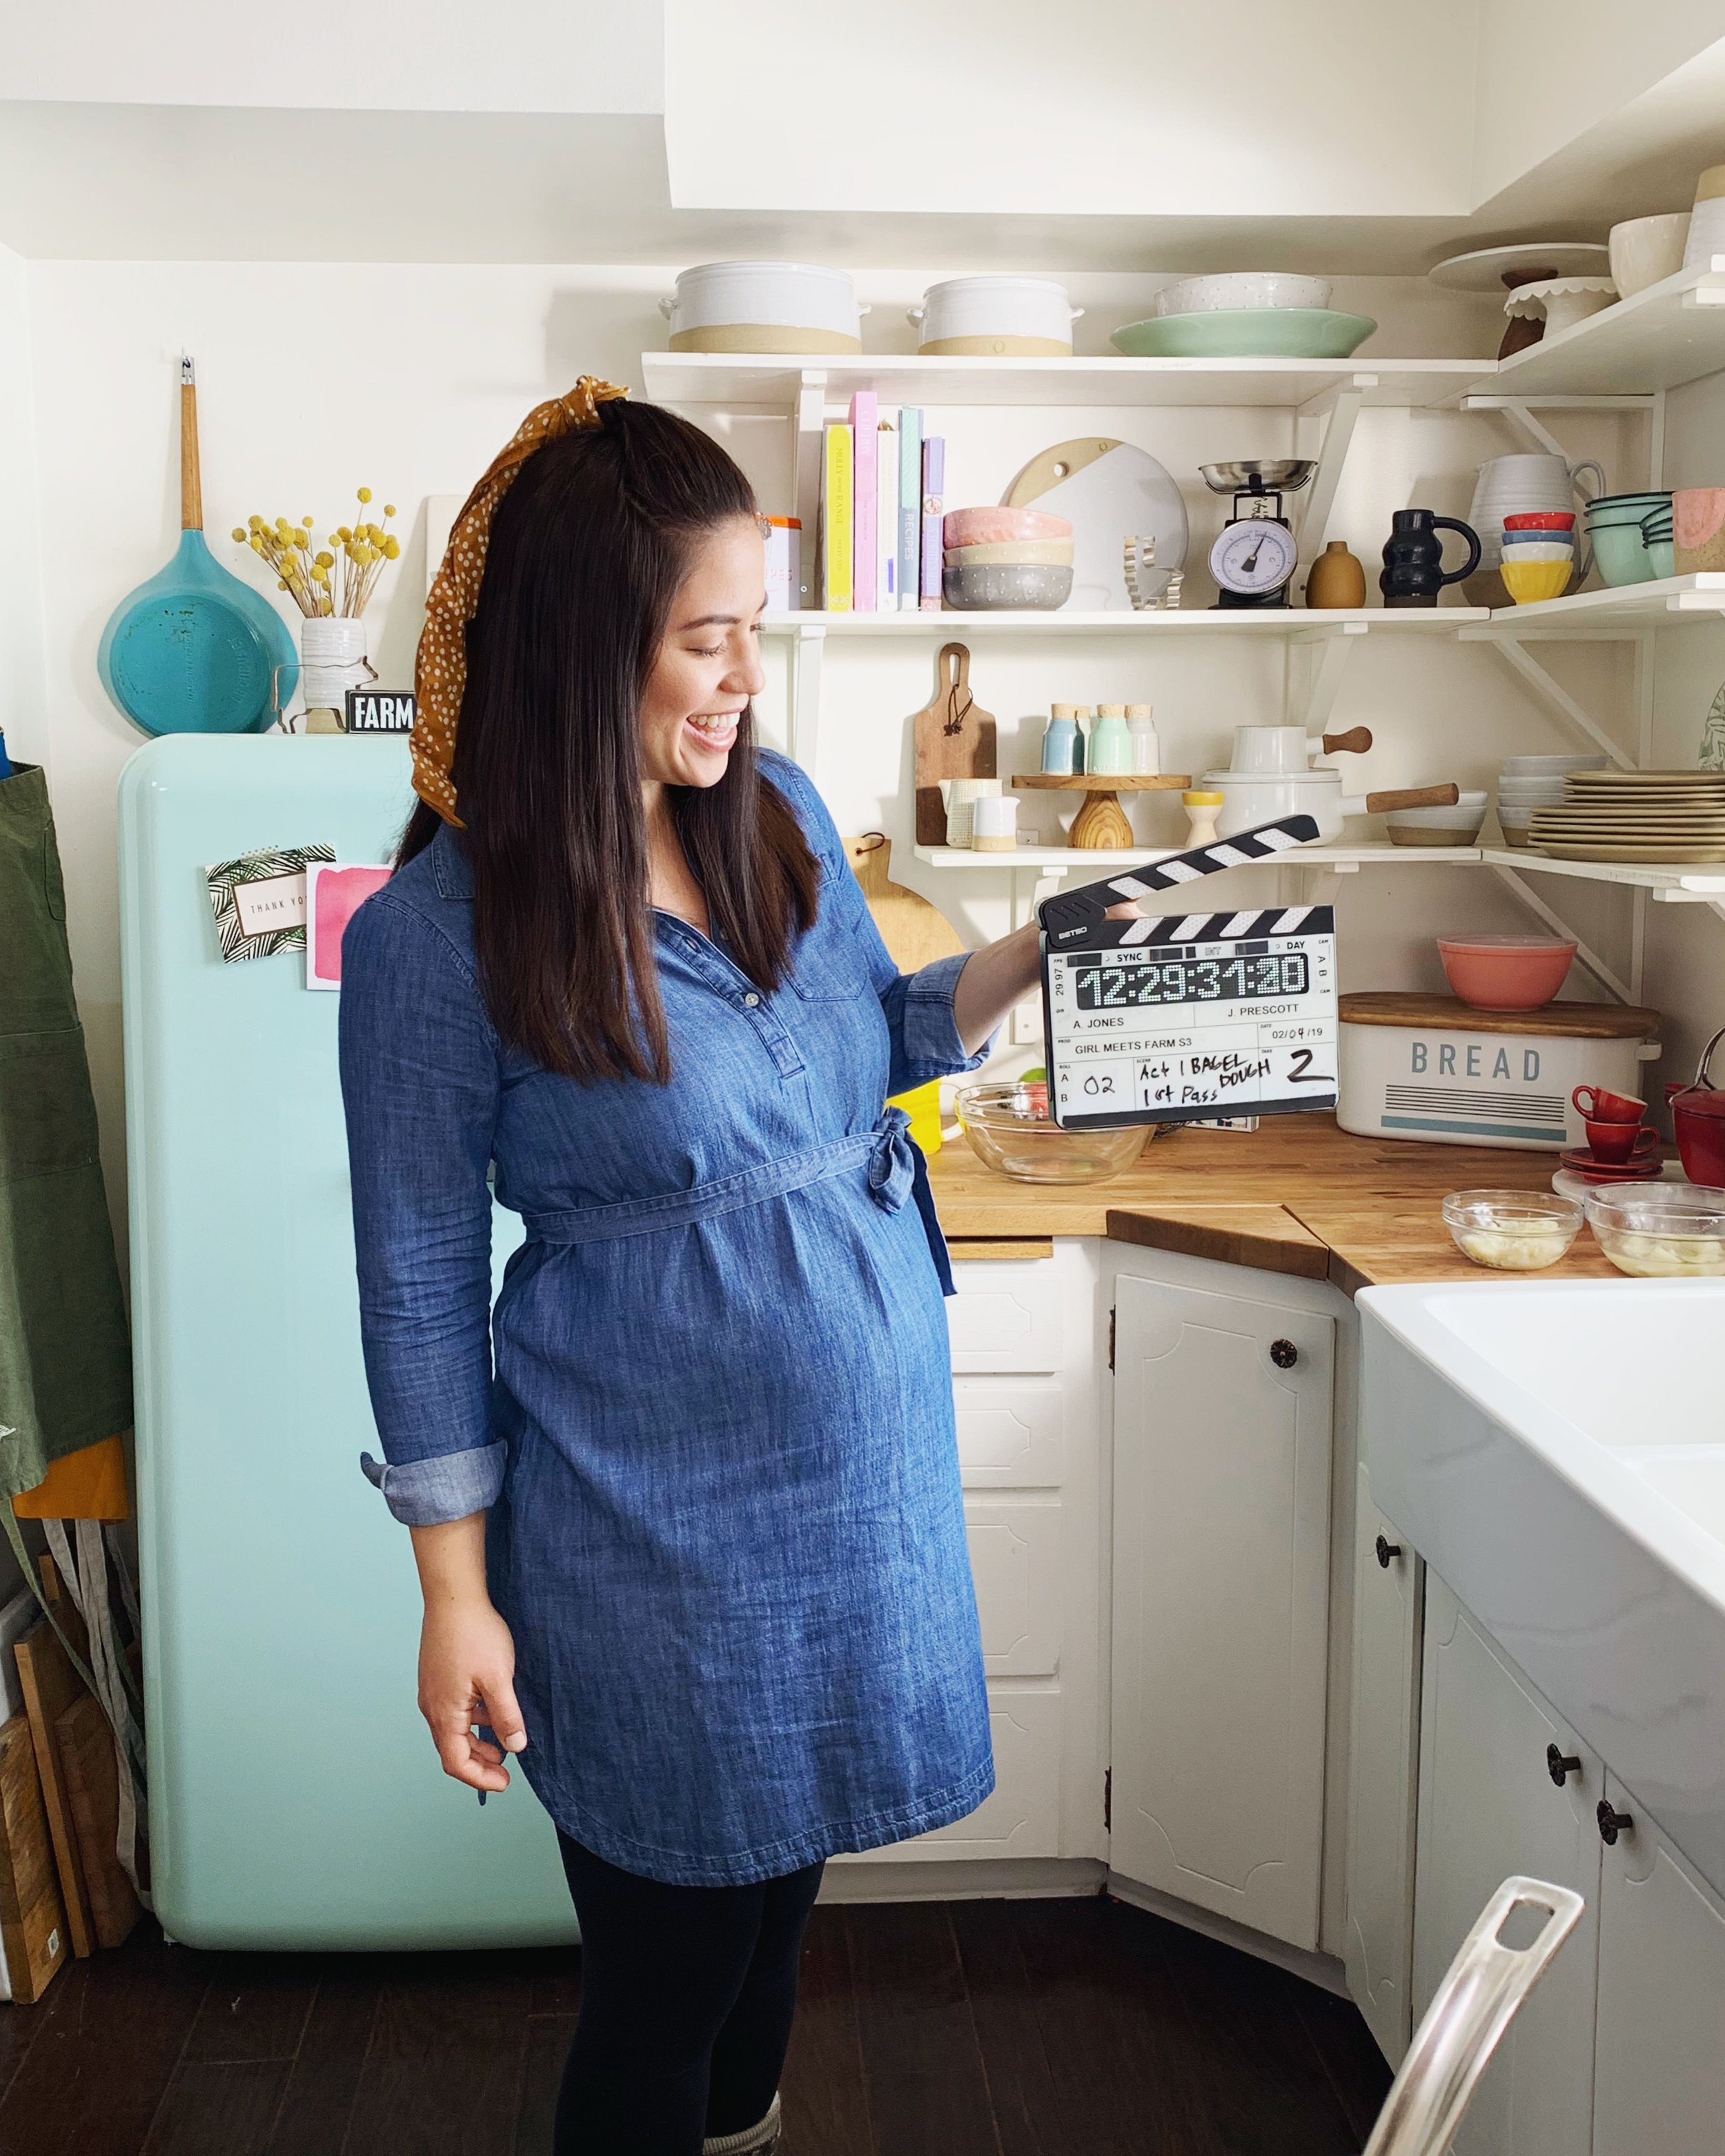
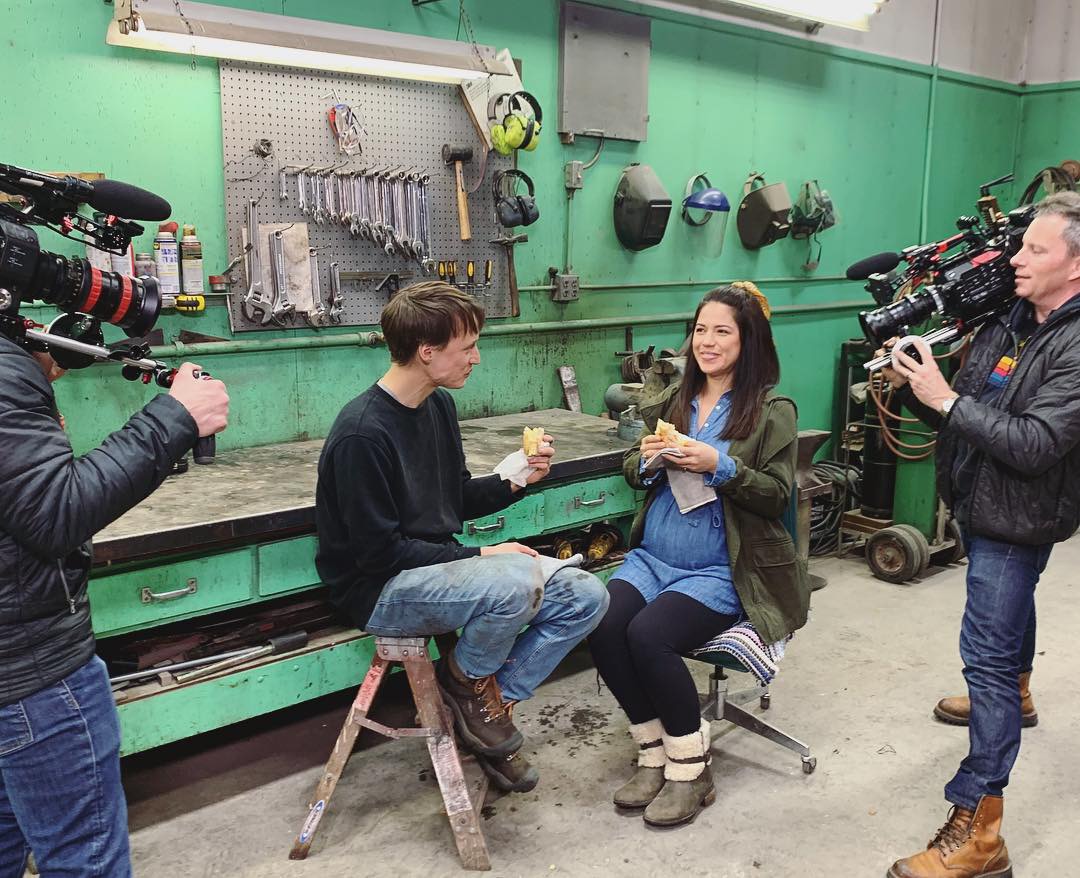
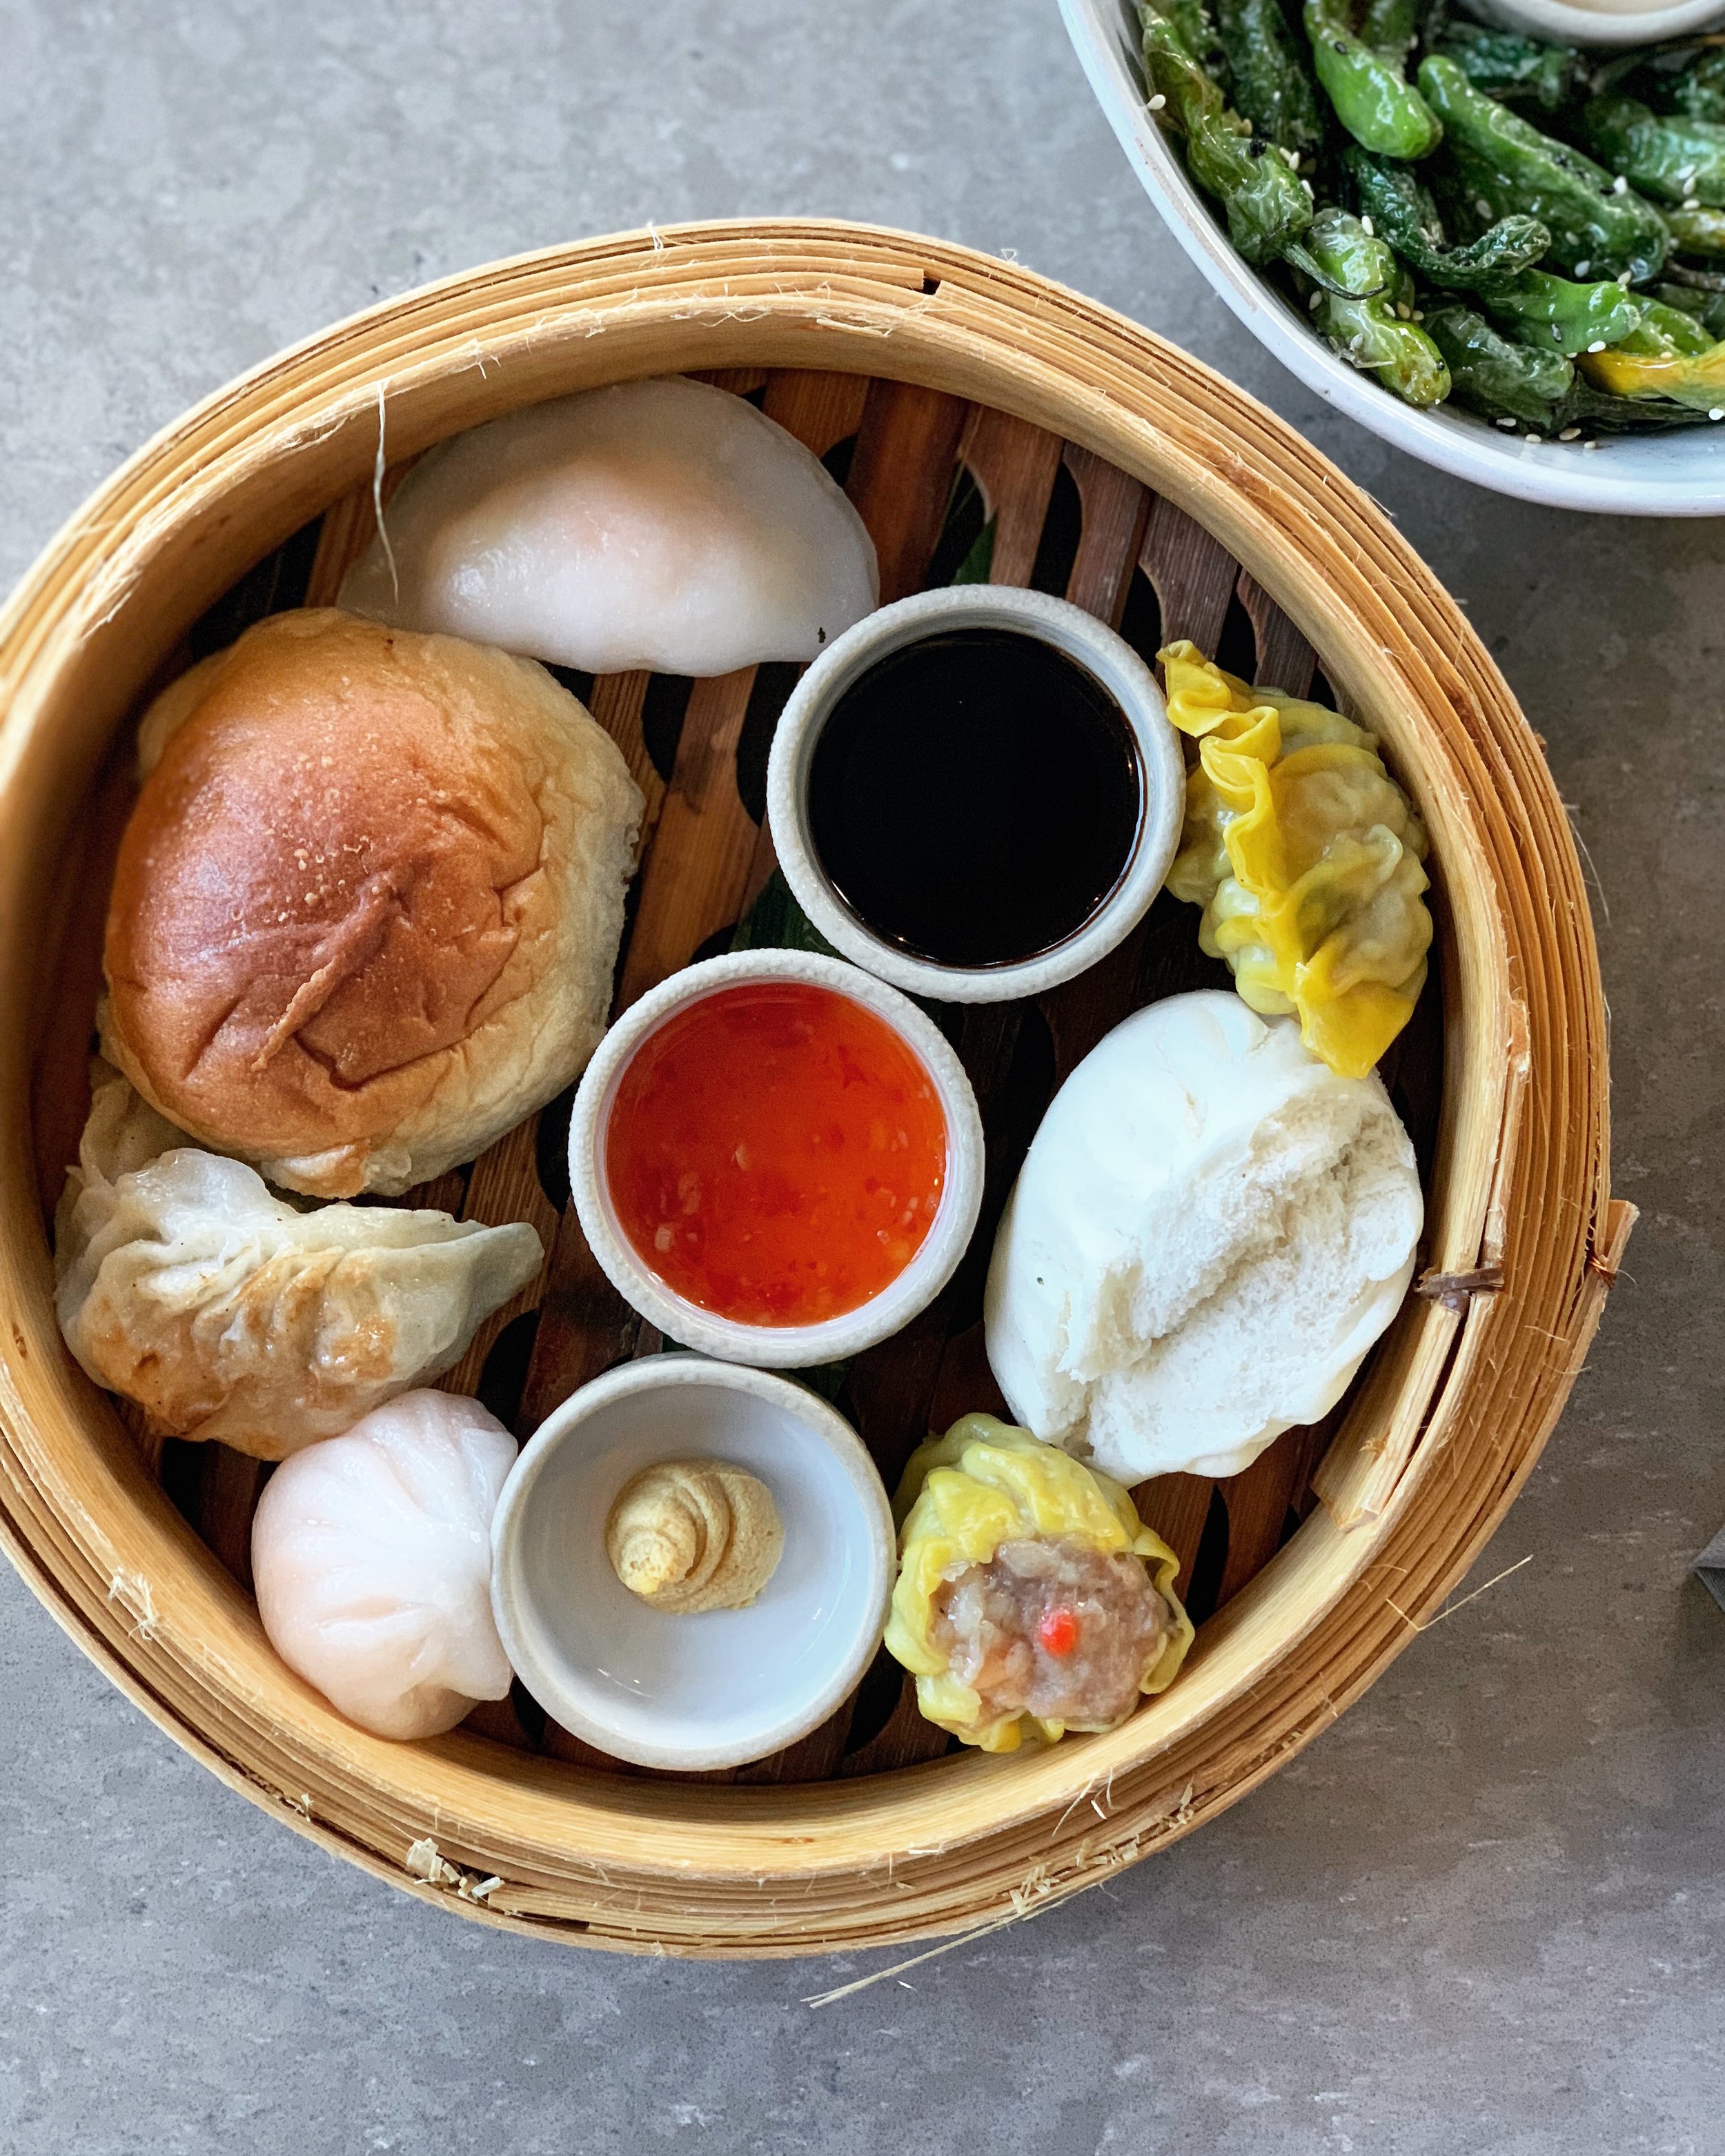
After making a bunch of Adam and Ryan’s potstickers for meal prep, I got on a potsticker kick and wanted to make more! Even though my very puffy pregnant hands made pleating a little bit difficult, I spent two extremely pleasant afternoons sitting at the kitchen table, folding dumplings while ice skating was on (this was back in February during the Four Continents competition). It also made me feel like I was in the dumpling scene in Crazy Rich Asians. For this second round of dumplings, I wanted a super low maintenance filling that would also pack some protein, so I went with a classic- egg and chive! The soft fluffy filling could not be easier and it’s so easy to adjust if you want a little more ginger or heat or whatevs. I also like that since it’s totally cooked before going into the dumplings, it makes for a kid-friendly project where you don’t have to worry raw meat getting everywhere. So, Bernie, when you’re ready, say the word and we’ll get pleating!!!


Egg and Chive Potstickers

Makes 38-40 dumplings

Ingredients

8 large eggs

1 tb soy sauce, plus more for serving

1 tb rice vinegar, plus more for serving

1 tb unsalted butter

1 tb sesame oil

1 tsp fresh ginger, minced or grated

1 c (1 1/2 oz) chives, finely chopped

Black pepper

Sriracha or crushed red pepper

All purpose flour, for dusting

40 store-bought dumpling wrappers

Flavorless oil (if frying)

Clues

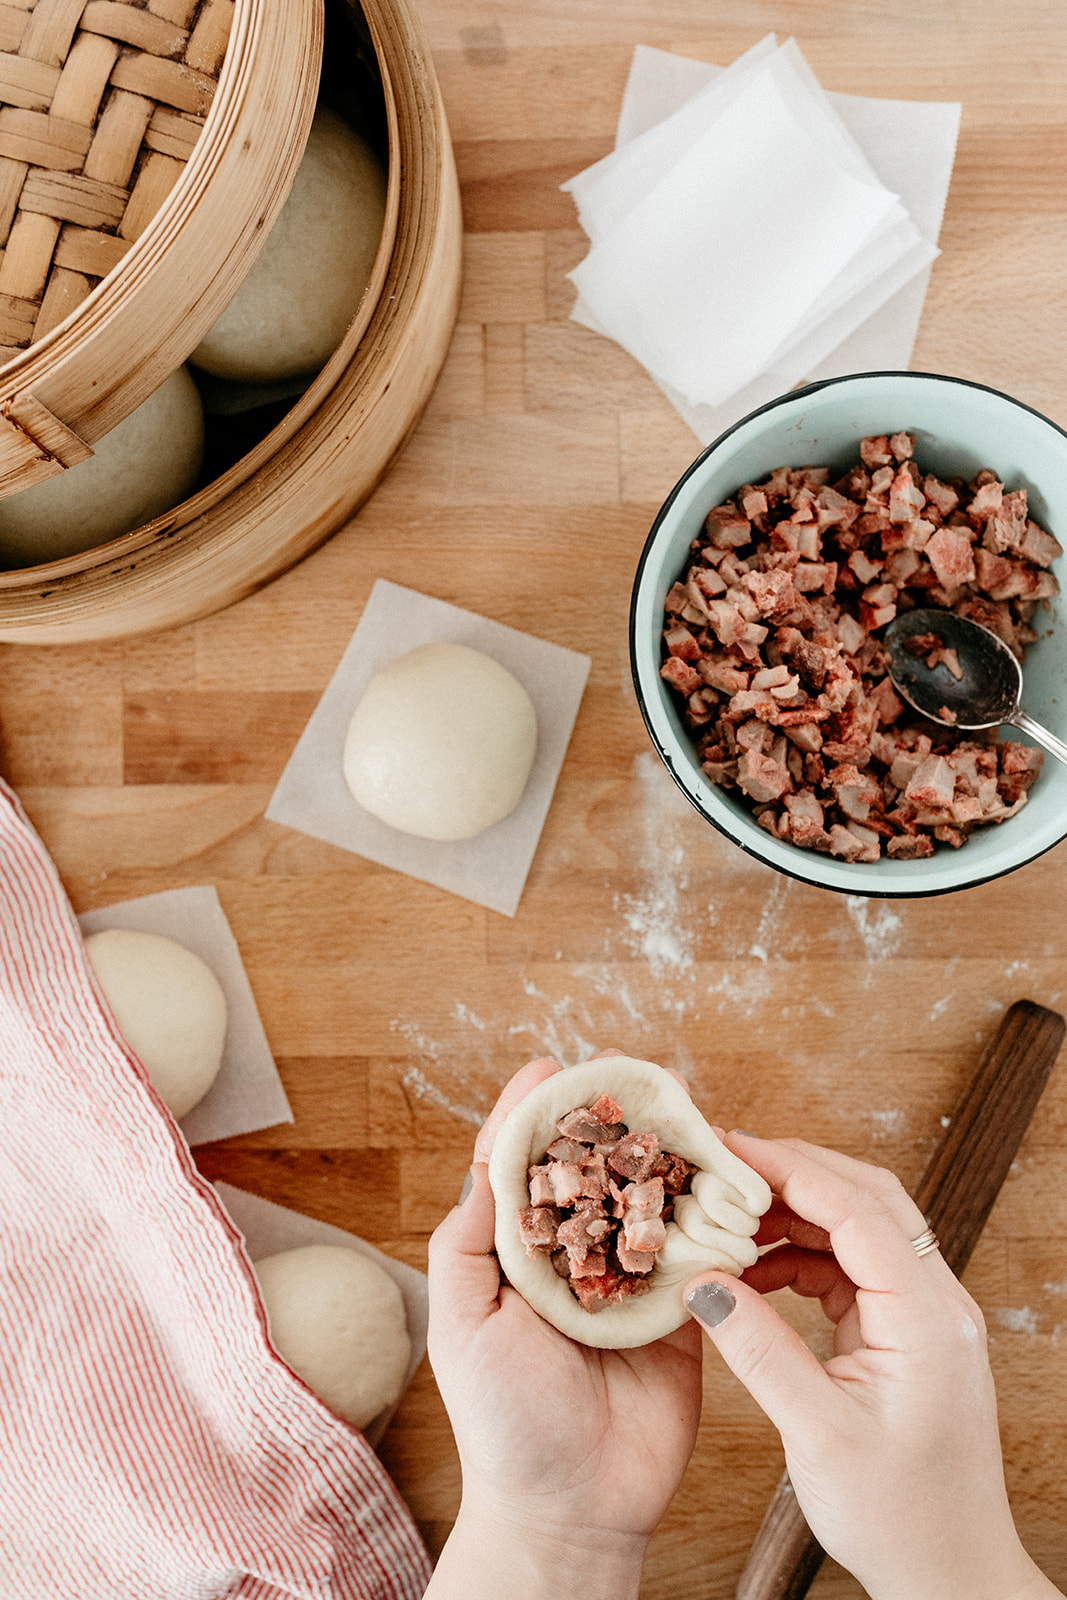
In a large bowl, whisk together the eggs, soy sauce, and rice vinegar and set aside. In a large skillet, heat the butter and sesame oil over medium high heat. Add the ginger and cook for about a minute, until fragrant. Add the eggs and cook, stirring gentled with a rubber spatula until just set (don’t over cook, otherwise the filling will be dry). Transfer to a large bowl (I use the same bowl that I whisked the eggs in) and break up the egg into small pieces with your spatula. Stir in the chives, a few good turns of black pepper, and sriracha or crushed red pepper to taste. Taste and adjust as desired.

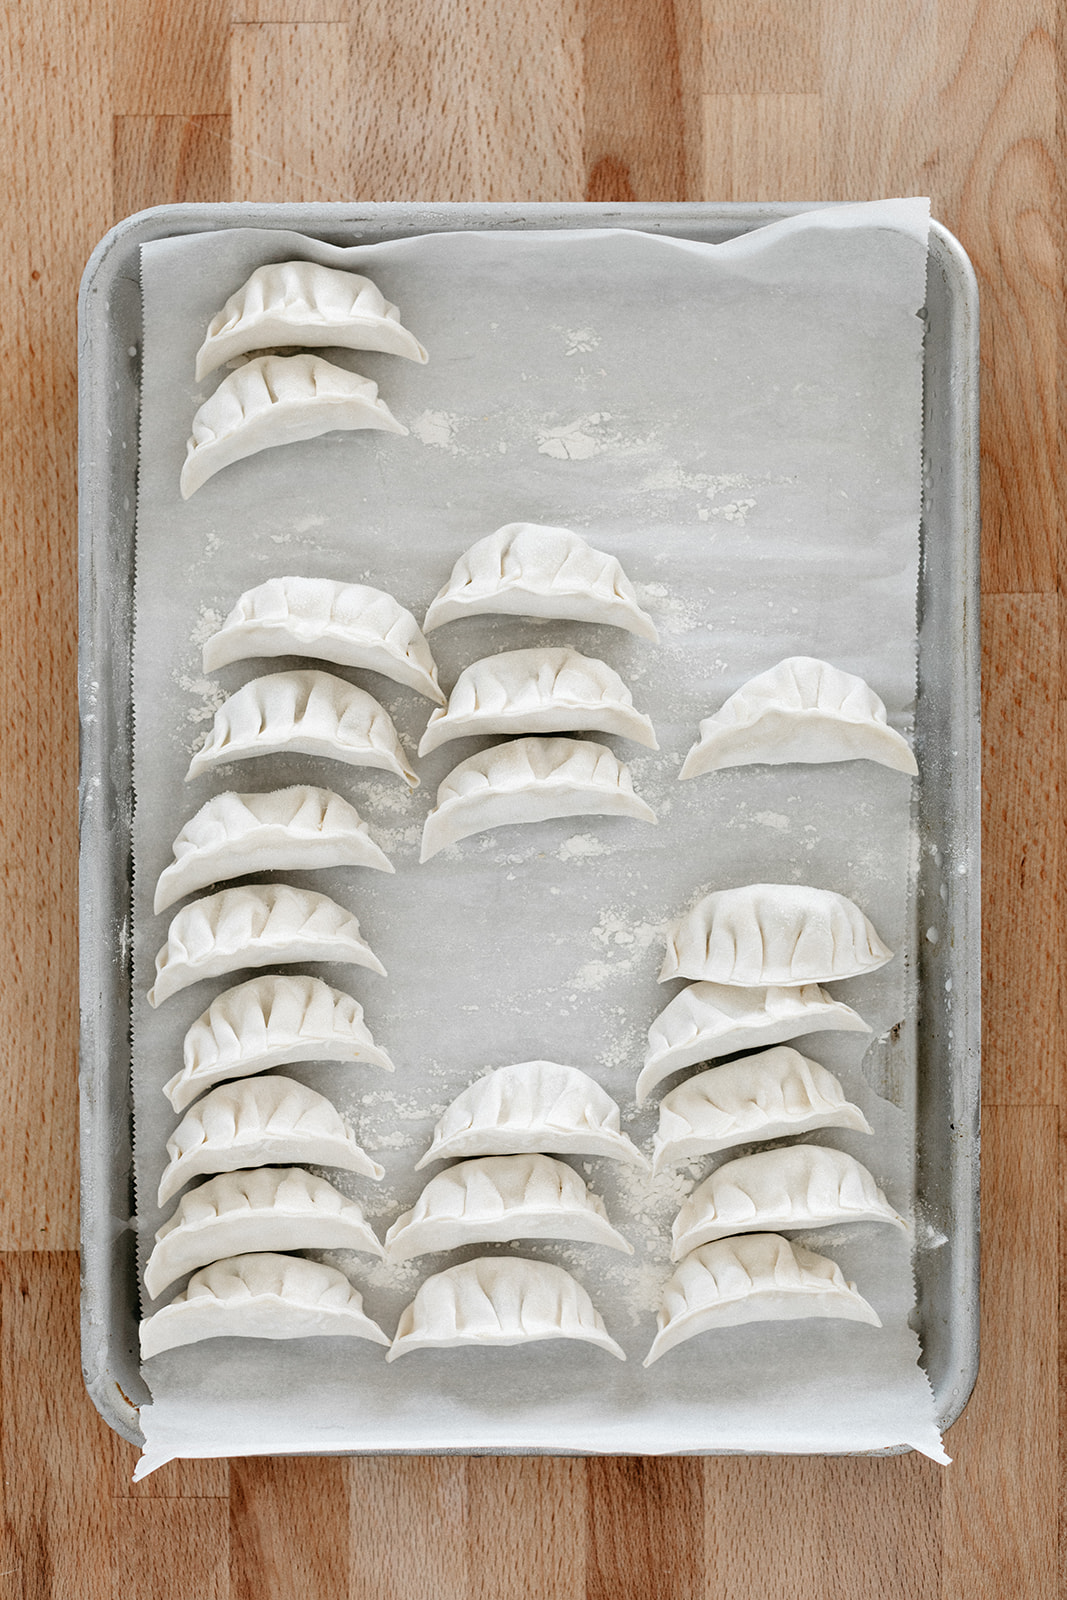
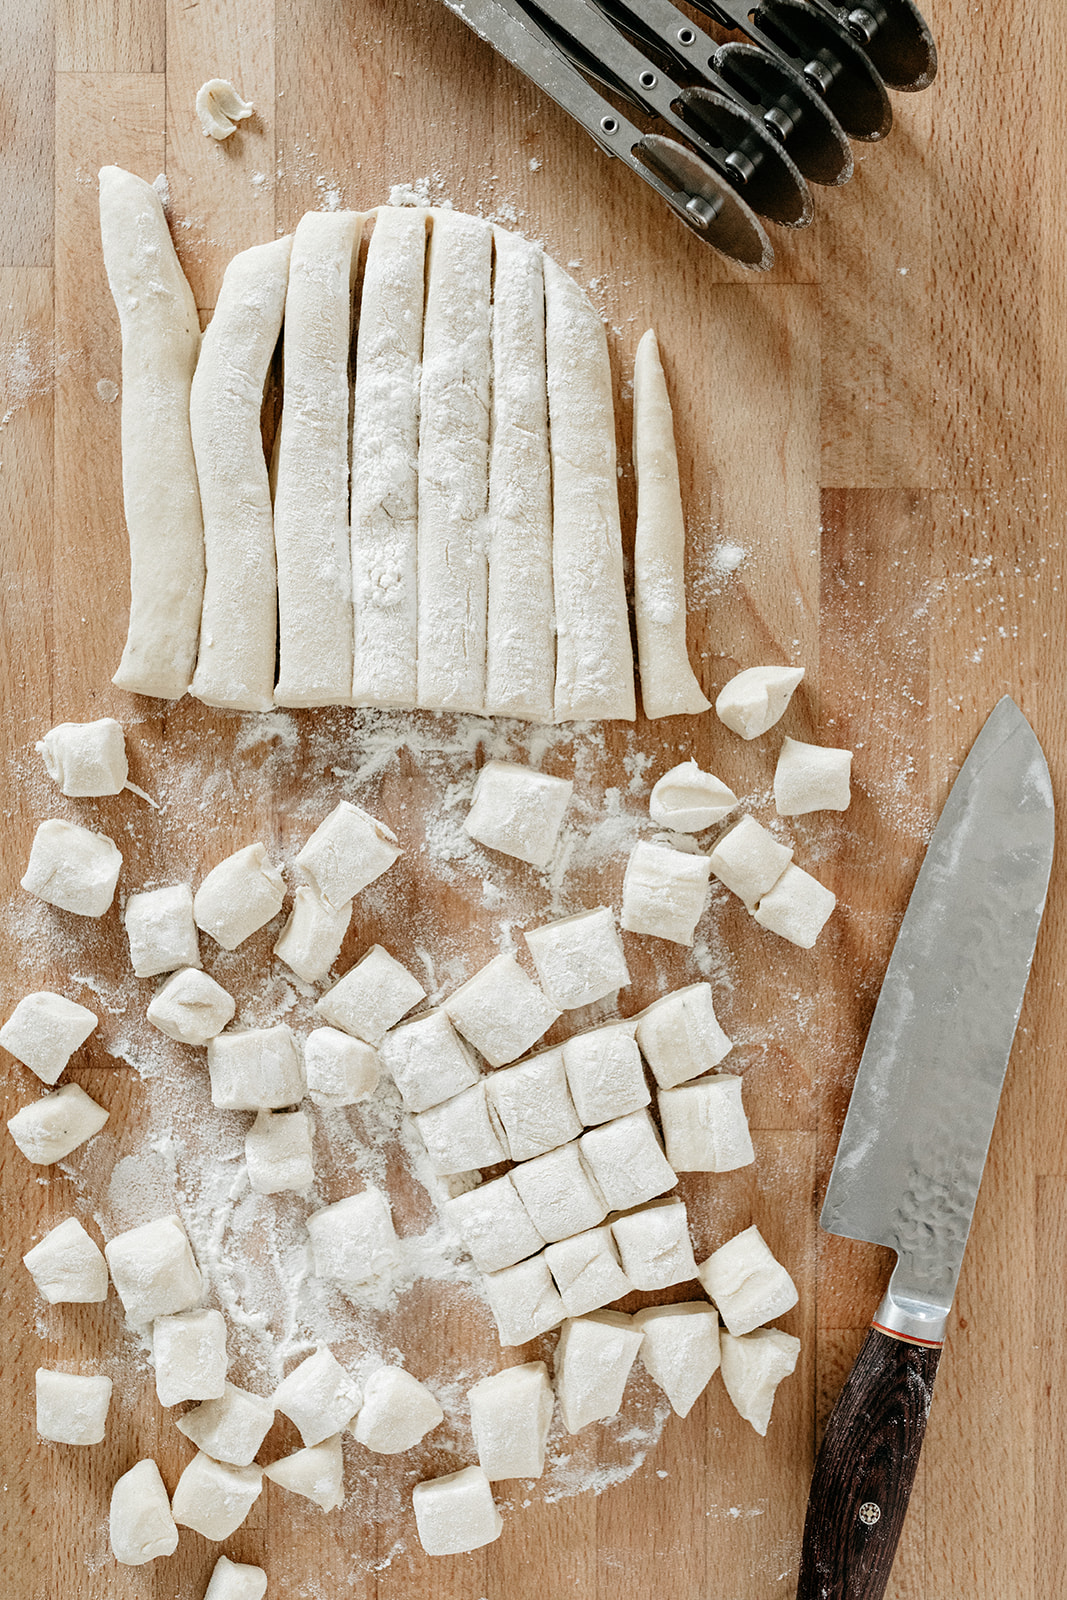
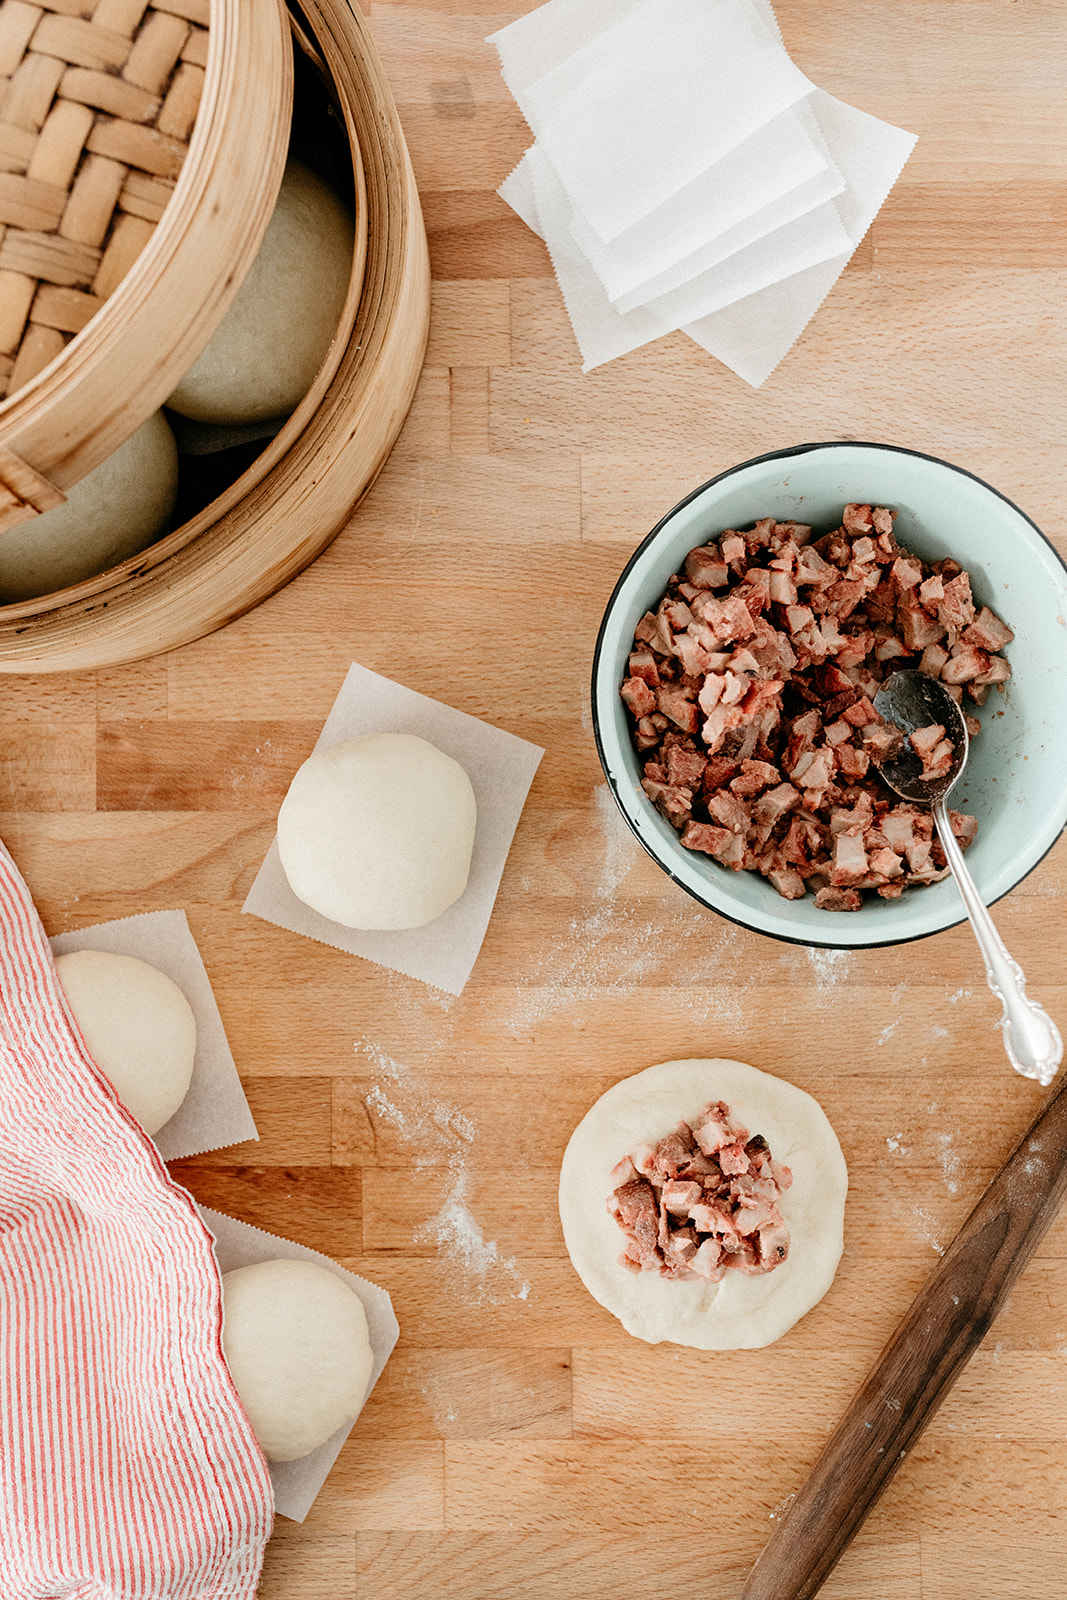
Line a sheet pan with parchment paper and dust with flour. Fill the dumpling wrappers by moistening the edges with water, adding a heaping teaspoon of filling, and pleating the edges, pinching well to seal. (I do this step seated at my kitchen table since it takes kind of a while. I’d also recommend YouTubing pleating videos, way easier to see it than to describe it!) Place the dumplings on the sheet pan. 

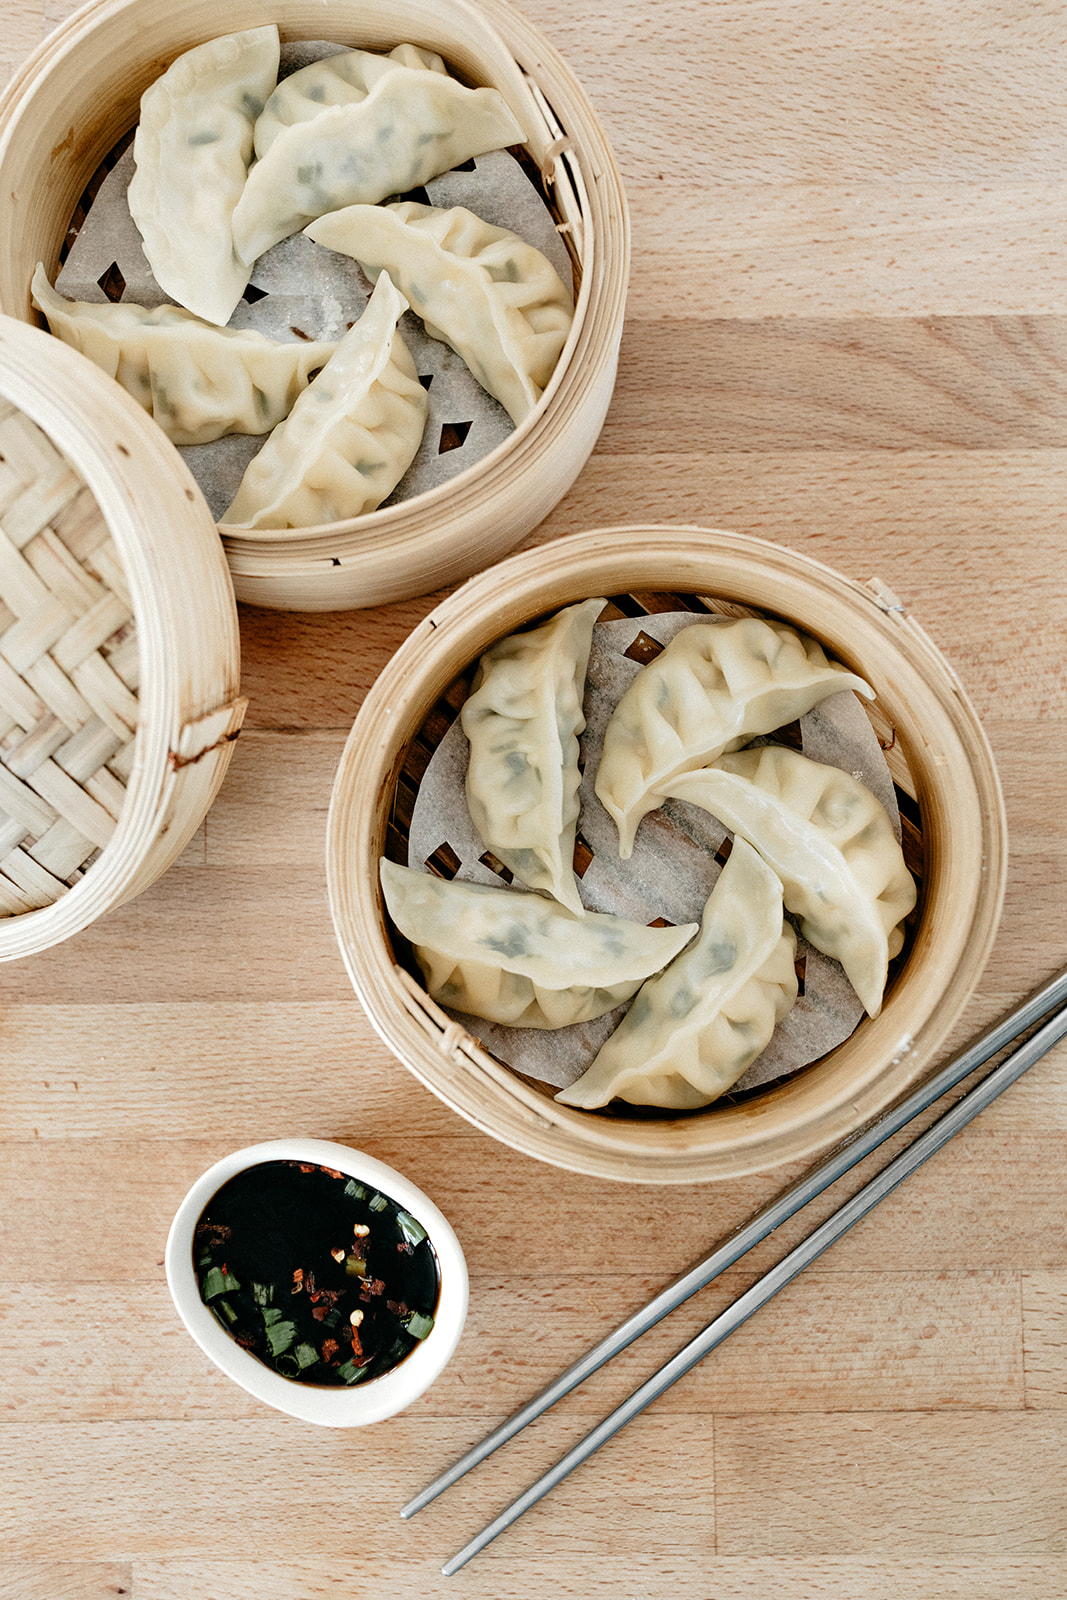
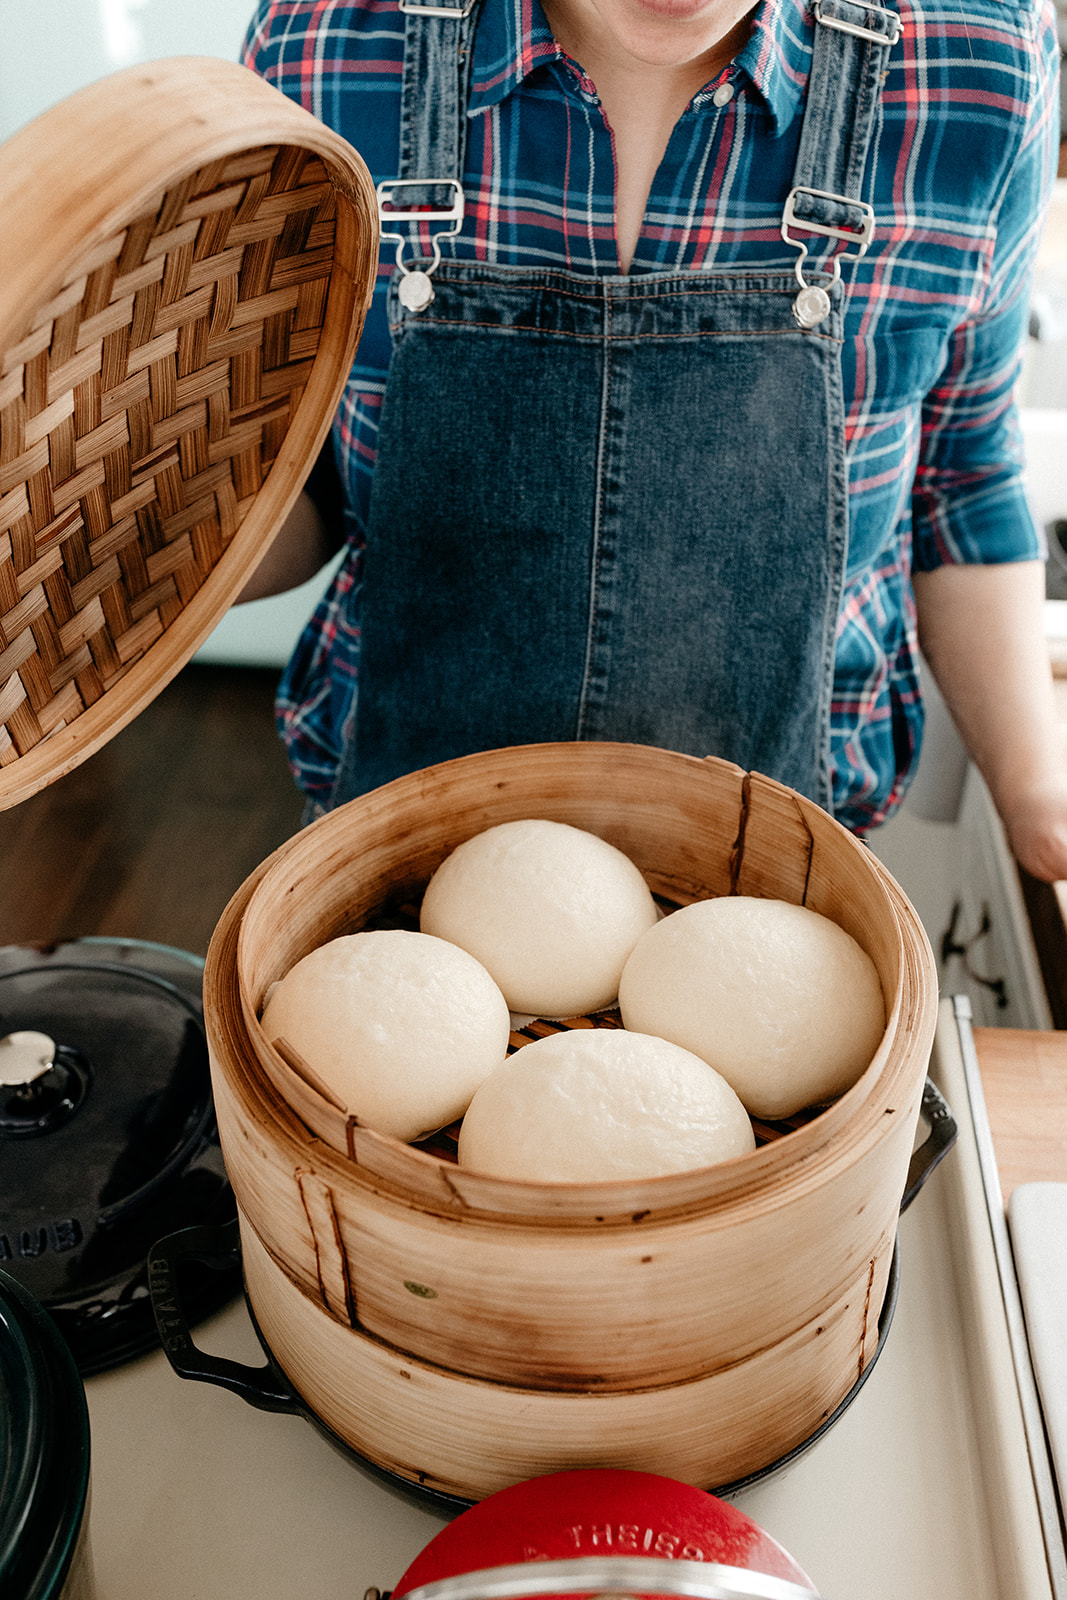
If cooking immediately, you can either steam or fry them. To steam, cut out a round of parchment paper to fit in the bottom of your steamer and cut a bunch of holes in it. Place the dumplings in the steamer leaving a little bit of room between them and set the steamer over a pot of boiling water. Steam for about 10 minutes, or until cooked through. Let cool slightly and serve. I like dipping mine in a half-and-half mixture of soy sauce and vinegar. Maybe a drizzle of sesame oil.

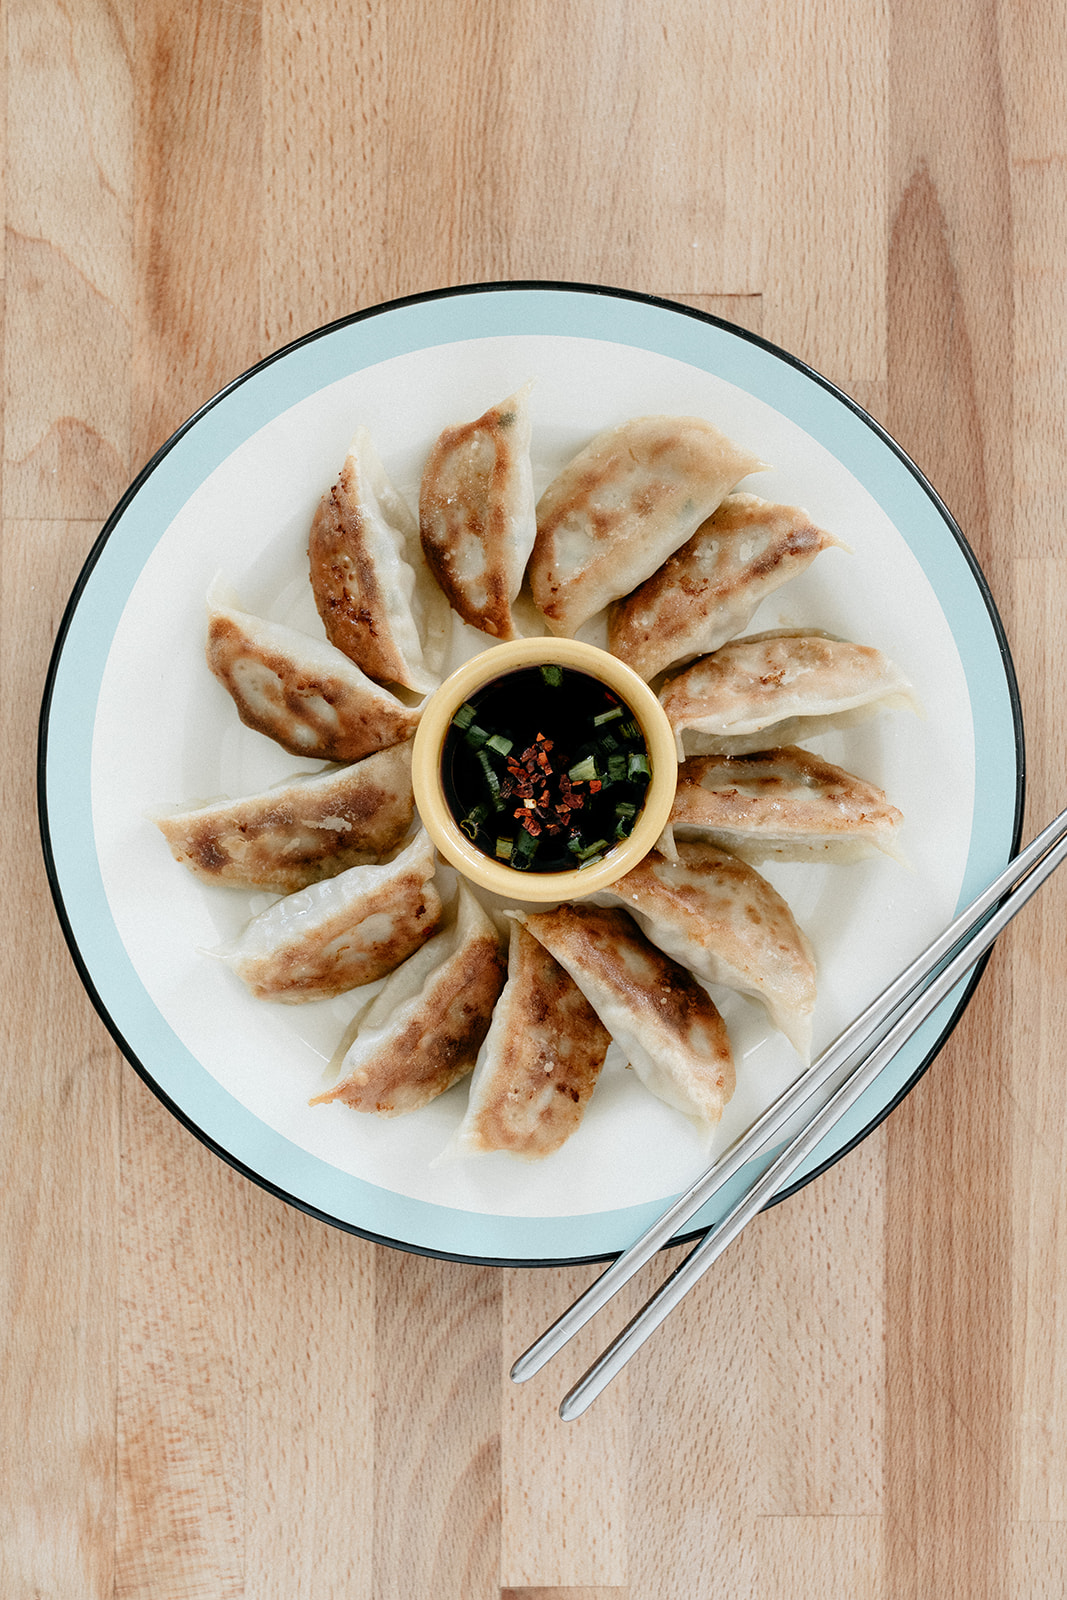
To fry, heat a thin layer of flavorless oil in a large lidded nonstick skillet. Place the potstickers flat-side down in the skillet in a single layer and cook until browned on the bottom, 2 to 4 minutes. Add 1/4 cup of water and immediately cover the pan, since it will be very spitty. Cook for 3 minutes, then remove the lid and continue to cook until all of the water evaporates. Let cool slightly and serve. I like dipping mine in a half-and-half mixture of soy sauce and vinegar. Maybe a drizzle of sesame oil.

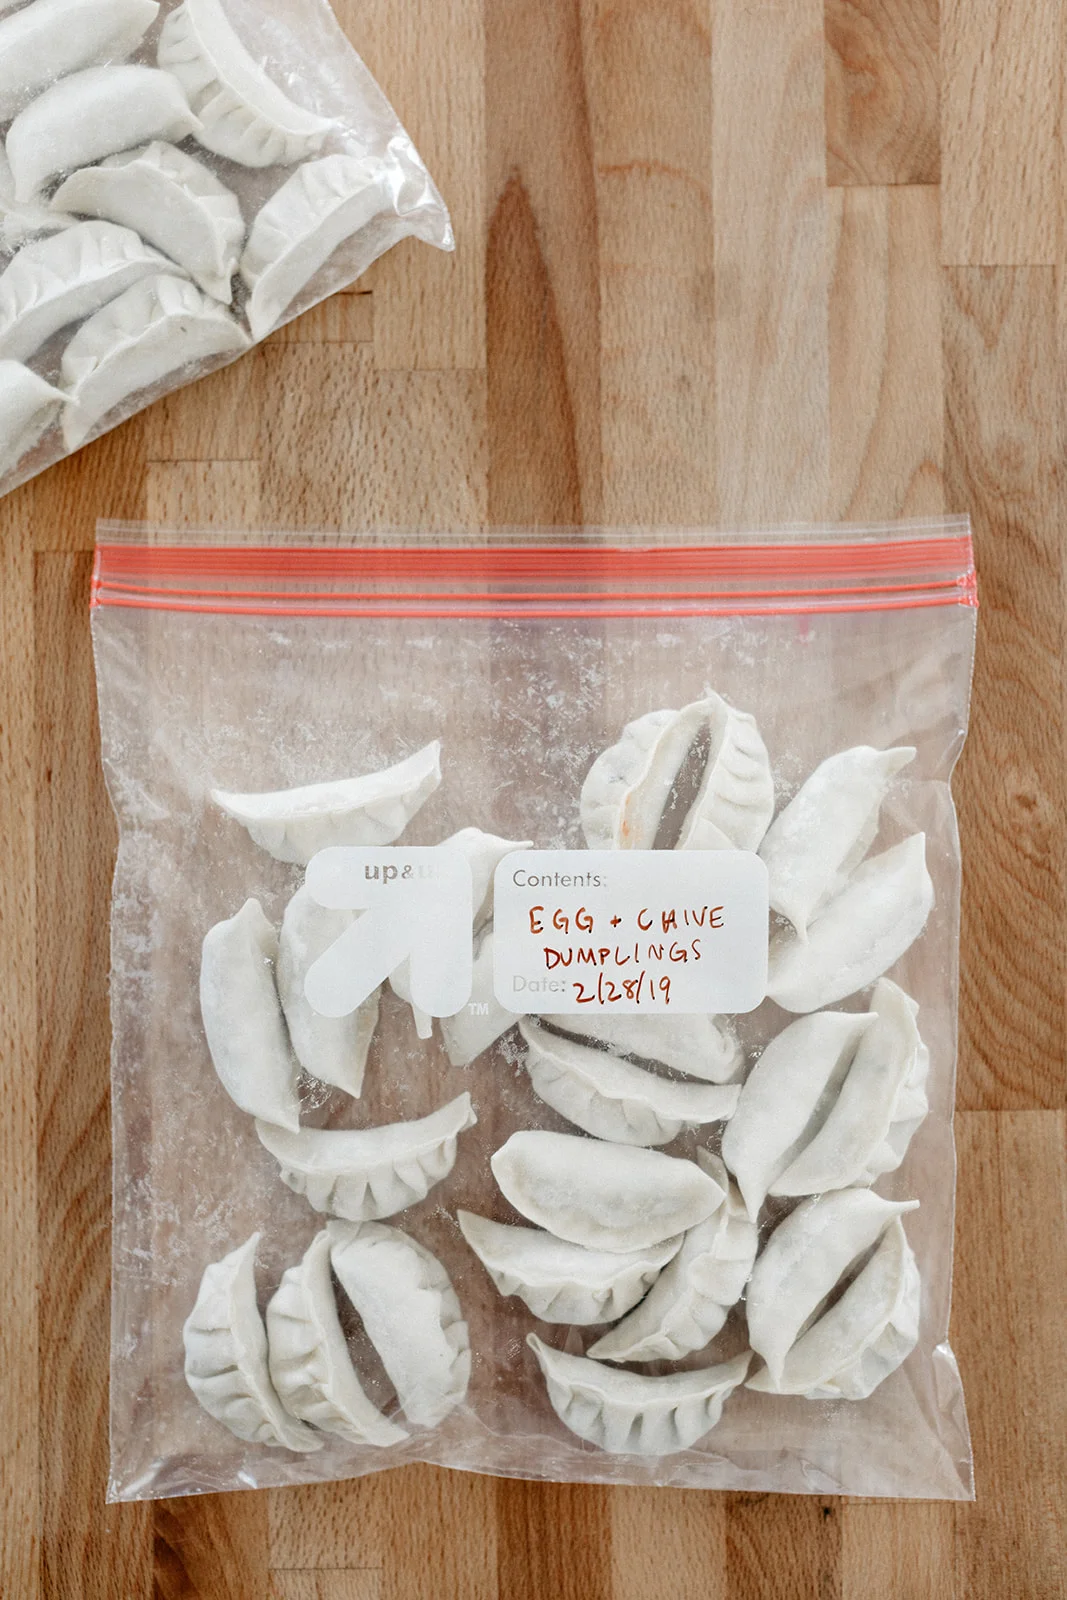
To freeze, stick the sheet pan into the freezer and freezer for a few hours until the dumplings are firm. Transfer to a ziploc bag and stick back in the freezer for up to 3 months. Heat them either by steaming or frying (adding an extra few minutes for each method), or using one of the methods here.


-yeh!

photos by chantell and brett quernemoen

veggie potstickers with spicy dipping sauce

Adam and Ryan from Husbands That Cook are two of the sweetest humans on the planet and I’m so excited to be sharing this recipe from their new book today! I’ve gotten to hang out with them a few times in LA and every time it’s like an espresso shot of joy. Their book totally captures that happy, joyous energy through a ton of delicious approachable everyday recipes that all happen to be vegetarian. I’ve kept their book on the shelf in my kitchen where I keep my most used cookbooks and it exudes great energy all over. One of the first things that I made from their book were these veggie potstickers and they are so good!!! I was deep in meal prep mode when the book arrived and looking for something kind of snacky and vegetabley that I could keep in the freezer, and these checked both of those boxes. So I made a big batch of them and kept a stash in my freezer for dumpling emergencies. The flavors are great, Adam and Ryan understand my need for a very gingery potsticker, and these can be steamed or pan-fried! I prefer them crispy and pan fried, but pulling out my little bamboo steamer and steaming a cute basket of them is also fun :)!

Anyway, if you don’t yet follow Husbands that Cook or have their book, get on it!!!! Your life will be warmer and more delicious, I promise. 


veggie potstickers with spicy dipping sauce

makes about 40

from Husbands that Cook

ingredients

for potstickers:

4 tb vegetable oil, divided

2 c (200g) finely chopped onion (about 1 medium onion)

3 c (185g) sliced bok choy cabbage (about 2 small cabbages)

2 c (155g) grated carrots (about 2 medium carrots)

1 c (120g) grated daikon radish (about one 6-inch piece)

2/3 c (40g) sliced scallions (about 3 scallions)

4 tsp tamari or soy sauce

2 tb (24g) minced ginger

3 large garlic cloves (15g), minced

40 gyoza wrappers

gyoza dipping sauce, for serving (to follow)


for dipping sauce:

1/4 c (60 ml) rice vinegar

1/4 c (60 ml) tamari or soy sauce

1/2 tsp sesame oil

1/4 tsp red pepper flakes

1/8 tsp garlic powder

1/8 tsp ginger powder

clues

for potstickers: place a large, deep skillet over medium heat, and add 2 tablespoons of vegetable oil. when hot add the onion and cook until softened, about 5 minutes. add the bok choy, carrots, daikon, and scallions, and cook for 4 minutes until softened, stirring occasionally. Add the tamari, ginger, and garlic, and cook for 1 to 2 minutes more. remove from heat and transfer the vegetable mixture to a bowl or plate to cool enough to handle comfortably. use the filling immediately, or transfer to a sealed container in the fridge for up to 3 days.

to make the potstickers, first prepare a work station with the gyoza wrappers, the bowl of filling, a small bowl filled with water to wet your fingers, and a tray lined with parchment for the finished dumplings.

hold one gyoza wrapper flat in the palm of your hand. scoop about 2 heaping teaspoons of filling into the center of the wrapper. fold the wrapper over, pinching and pleating the edges to seal them tightly. place on the prepared tray, and repeat with the remaining wrappers until all the filling is used up, arranging the finished potstickers so they are not touching. they can be cooked immediately, or frozen for future use (freeze them directly on the tray, then transfer to a sealed container in the freezer for up to 2 months).

place a large, deep skillet over medium heat, and add the remaining 2 tablespoons of vegetable oil. when hot, place the potstickers flat-side down in the skillet in a single layer, as many as will fit comfortably without touching. cook without stirring until deeply browned on the bottom, 2 to 4 minutes (add 1 to 2 minutes of cooking time if frozen). without stirring, add 1/4 cup of water and immediately cover the pan, as it will spatter aggressively. cook for 2 to 3 minutes, then remove the lid and continue to cook until all of the water evaporates. serve immediately with dipping sauce and enjoy!

for dipping sauce: in a small bowl or measuring cup, stir together all the ingredients. let sit for 15 minutes before serving to allow the flavors to blend. use immediately or keep in a sealed container in the fridge for up to a week. makes about 1/2 cup.


-yeh!

photos by chantell and brett!

knoephla soup

We have had a great big week! On Friday, we wrapped filming and ate a bunch of fried food to celebrate. It was so sad to see everyone go, but unlike the past two seasons when I didn’t know if the show would be renewed or not before wrapping, this time I knew they’d all be back in July! And they’ll be able to meet Poppy Seed! Over the two weeks of filming, Poppy Seed grew soo much and also flipped to be head down. For a little while I kept patting what I thought was her head but then we went to the doctor and confirmed that I’d been patting the butt this whole time. Hehe. Even though the counter became further and further away, my carpal tunnel symptoms luckily subsided (there will be a lot of pre-chopped vegetables in these episodes!) but then my brain turned to mush! Toward the end of the run it sometimes took me like six attempts to explain the simplest things like how to put sprinkles on the rugelach. And I dropped an entire tray of choco tacos. But thankfully I was able to hold onto my energy for the most part and avoid back pain, which were my two greatest fears other than over baking the potato bagels. On my evenings and days off, I recharged by swimming, watching figure skating, and descending deeper into my bachelor obsession. 

After wrapping, Eggboy and Poppy Seed and I were thrown the most beautiful baby shower by our moms (soon to be grandmas!), sisters (aunties!!!), and friends. It was sprinkle and hotdish themed, and they took my fear of baby shower games seriously so it was a lovely afternoon of eating confetti petit fours and tater tot hotdish, hanging out with friends from near and far, writing funny things on diapers, and unveiling the sweetest gifts that ranged from ultra practical (mountains of diapers!) to ultra homespun (like cousin Elaine’s hand knit sprinkle cupcake hats!!) to ultra hippo. I’m obsessed with this hippo. He’s sitting right next to me and I can’t stop looking at him and giggling. Eggboy and I felt soo loved and got even more excited to bring Poppy Seed into our extremely rad mishpocha. 

Continuing on with my list of foods that I plan to stock in our freezer for my maternity leave, I have to share this soup with you that is the best kept secret of the upper Midwest. Knoephla soup is right up with tater tot hotdish as my favorite new food that I’ve learned about since moving here. Knoephla (neh-fla) are little chewy dumplings that made their way to this area with German immigrants and are most commonly enjoyed in creamy potato soup, but can also be sautéed with sauerkraut and sausage or put into hotdish. They are kind of like plumper smoother spaetzle and the frozen store-bought ones look a lot like mochi bits. Knoephla soup is traditionally made without meat, just potatoes, vegetables, a bit of cream, and my favorite (from Dakota Harvest, r.i.p.) had the most warming hit of nutmeg. The texture of the dumplings and the pure comfort of it all makes this the kind of soup that I just shovel into my mouth with abandon. We had it at our wedding and for years now I’ve wondered why it hasn’t seemed to pick up that much popularity outside of the upper Midwest. The #knoephla hashtag is my favorite hashtag to follow on IG but all of the posts are from North Dakota! Many of them are from Kroll’s dinner, which has a killer version that you can supposedly buy by the bucket (?!), just in case you find yourself at one of those. This is probably one of the only areas where you can buy frozen knoephla at the grocery store, but not to worry, they are very easy to make. I have a recipe in Molly on the Range for knoephla soup but this is a new and improved version because over the past couple of years I’ve started adding more herbs to it, including an egg in the dumplings for added chewiness, and making a much bigger batch so that I can freeze some. I’m not sure if adding dill would be considered the most traditional move, but as I become closer and closer to being a Jewish mother, I’m more inclined than ever to channel severely dill-y matzo ball soup vibes into, like, everything. So while it’s still winter, make a gigantic batch of this and then eat it on the couch from under a fluffy blanket. 


knoephla soup

Serves 8-10

ingredients

3 tb unsalted butter

1 large onion, chopped

2 large carrots, chopped

2 celery stalks, chopped

kosher salt and black pepper

2 cloves garlic

1/2 tsp nutmeg

10 c chicken or vegetable stock

1/2 tsp dried thyme

2 sprigs dill, chopped

4 sprigs parsley, chopped

2 bay leaves

1 1/2 lb (680g) red potatoes, chopped into 1/2” pieces

1 1/2 lb (680g) store-bought frozen knoephla or homemade knoephla (recipe below)

1/2 c (120g) heavy cream

clues

in a large pot, melt the butter over medium-high heat. add the onions, carrots, celery, a good pinch of salt, and a few turns of black pepper and cook, stirring often, until the vegetables soften, about 10 minutes. add the garlic and nutmeg and cook, stirring, for 2 more minutes, until fragrant.

stir in the stock, herbs, bay leaves, and potatoes, increase the heat to high, and bring to a boil. reduce the heat to a simmer, cover, and cook for 40 minutes, stirring occasionally. if using store-bought frozen dumplings, add them when the soup reaches a boil. if using homemade dumplings, begin making them when the soup reaches a boil and then add them for the last 20 minutes of simmering.

stir in the cream. taste and adjust seasonings as desired. remove the bay leaves before serving.

enjoy!

to freeze, let cool and transfer to freezer safe containers. freeze for up to three months and defrost in the microwave or overnight in the fridge, and then reheat in the microwave or on the stove.

knoephla

3 1/4 c (422g) all-purpose flour, plus more for dusting

1 1/2 tsp baking powder

1 1/4 tsp kosher salt

black pepper

1/8 tsp nutmeg

1 c (236g) water

1 large egg

to make the knoephla:

in a medium bowl, whisk together the flour, baking powder, salt, a few turns of pepper, and the nutmeg. stir in the water and egg and mix to form a shaggy dough. turn it out onto a clean work surface and knead it for a few minutes, adding flour as needed, until you have a smooth and stiff dough. roll it into 1/2”-thick blob, cut into 1/2”-3/4” squares, dusting with flour so they don’t stick together, and drop them directly into simmering soup.


-yeh!

photos by chantell and brett! dutch oven by great jones!

manapua (barbecue pork buns!) + maui!

Babymoon success!!! Our trip to Maui was perfect in every way, from the dolphins we met to the donuts we ate to the fact that we wore the same clothes almost the entire time. Each morning we walked outside, did an arm stretch, and said out loud ahh, another day in paradise! And then we either picked up a spam musubi at the Foodland and went on an adventure or went to the breakfast buffet, read the newspaper, and then rolled outside for our daily dip. We swam in such wonderful settings, first snorkeling on Lanai where we saw the most beautiful florescent blue fish, then sunset beach floating near our hotel, then snorkeling near our other hotel where we saw two sea turtles (and they saw us! they waved!), and finally actual lap swimming at the infinity pool to burn off all of our musubis. My swimming skills still hover around Guppy, but boy do I love it. We read parenting books on the beach, ate hurricane popcorn and pineapple by the pound, and just generally got lost in daydreams of Poppy Seed. Eggboy took an interest in learning everything there was to learn about the tiny macaroni-shaped island that we could see from the beach in Wailea. And though we searched long and hard for the one legged chicken that I saw on my Maui trip three years ago, we did not find him. 

Hawaii cured me of the cold that I denied having before I left and it made me feel readier than ever to tackle these next two months, even if none of my pants fit and walking up a flight of stairs feels like climbing Mount Everest. We’ve got baby classes to go to, a crib to set up, hospital bags to pack, and every single fluffy baby teddy bear suit to buy (omg). 

Leaving Hawaii was so bittersweet because it really was the best week ever and I didn’t want to leave but as we left, Eggboy reminded me that the next time we’d be back, we’d have a little nugget in tow, armed with floaties and sand castle tools and everything! Oh I can barely imagine that without crying. I’m going to be a very weepy mum. 

Here are a list of my Maui recs from this trip! There aren’t too many this time since most of the places we went were places we’d been to and loved before. For those recs, see this post and this post.

Trilogy’s Lanai trip! The best thing to do on the first day when you’re still on mainland time and can wake up super duper early is to do this sunrise boat tour to Lanai where you eat great cinnamon rolls and watch whales as the sun comes up and then spend the day snorkeling, touring, and eating. 

Lineage: There were so many surprising delights at Lineage, like the salad covered in meat juice and pasta salad mayo meant to represent the bottom of a plate lunch, the fresh veggies from Oprah’s garden, and this thing called a Flying Saucer which was basically a meat and cheese Uncrustable.

Maui Cones at the Upcountry Farmers Market: This is Alana’s friend Kammy’s sushi and mochiko chicken cone stand and it is soo tasty. And the whole Upcountry Farmers Market is great! I got a super cute ube whale oreo. 

Paia Fish Market: I just wanted more stomach space here so that I could squeeze in another fish taco. 

Four Seasons and Ritz: We split our time between these two hotels and they were both great!!

In celebration of all things Hawaii (and in advance of the upcoming Chinese New Year), I’m sharing the barbecue pork bun recipe from Alana’s forthcoming cookbook, Aloha Kitchen!!! This is a book that you need, and that the world needs, because too many people (including myself until I became friends with Alana) have this impression that Hawaiian food is pineapple and ham. On a pizza. I mean, I love pineapple and ham on a pizza, but if there is one single most important thing that Alana has taught me (other than how to use a straightener to curl my hair haha), it’s the real definition of food in Hawaii. It’s vibrant and dynamic and it wears its history on its shoulders, with displays of Portuguese, Chinese, Japanese, Filipino, Korean, Western, and native Hawaiian influences. I was surprised to see how meat-centric the food of Hawaii is, but it makes sense when you consider the influences, and between the mochiko chicken and spam musubi recipes, I am so into it. I’m also extremely excited about the recipes for the kinds of fun snacks that make browsing in Hawaii grocery stores so fun, like li hing gummy bears and hurricane popcorn. 

But of course the first thing I had to make from Aloha Kitchen were these barbecue pork buns, or manapua, which is a Hawaiian word that literally means “delicious pork thing.” This is Hawaii’s version of the Chinese classic, and I love that in Hawaii, you can get gigantic versions. It’s like eating a burger. I tasted tested these when Alana was testing them for her book, and they brought me right back to eating dim sum with my family when I was little. I used to remove the filling and only eat the bready parts, but I loved the sweet meaty flavor that the filling left behind. I think I just didn’t like the texture. These days though I love all of the parts of the bun, the fluffy outters and the chewy innards. They are the best. Alana nailed it with this recipe and you really ought to make these. They freeze beautifully and reheat quickly in the microwave too, so these will no doubt be on my list of freezer foods to make before Poppy Seed’s arrival. 

Also pre-order Alana’s book right now please.  It’s beautiful and incredible!


manapua

makes 12

from alana’s aloha kitchen

ingredients

for the bun dough:

3/4 c (177g) water, warmed (100º to 110ºF)

1 1/4 c (295g) whole milk, warmed (100º to 110ºF)

two 0.25-ounce packages (14g) active dry yeast (4 1/2 tsp total)

1 tsp plus 3/4 c (150g) sugar

4 c (520g) all-purpose flour, plus more as needed

2 c (260g) cake flour

1/2 tsp kosher salt

1/2 c (100g) neutral oil, plus more for the bowl

for the filling:

1/2 c (118g) water

2 tsp cornstarch

2 tsp all-purpose flour

1 tb sugar

1/4 tsp kosher salt

1 1/2 lb char siu pork (recipe follows), minced

clues

to make the dough for the buns, combine the water, milk, yeast, and 1 teaspoon of the sugar in a bowl and whisk together. let the mixture sit until the yeast is activated and foamy, about 10 minutes.

in the bowl of a stand mixer fitted with the dough hook, combine both flours, the salt, and the remaining 3/4 cups sugar. mix the dry ingredients together on low speed. keep the mixer running and slowly pour in the yeast mixture followed by the oil. increase the speed to medium and knead the dough until it is smooth and pulls away from the sides of the bowl, 5 to 7 minutes. if it does not start to pull away from the sides, add more flour, a tablespoon or two at a time. turn the dough out onto a clean work surface quickly so that you can oil your stand mixer bowl. transfer the dough back into the oiled bowl, flipping once to coat both sides, and cover the bowl loosely with plastic wrap or a clean kitchen towel. let the dough rise until doubled in size, 1 to 2 hours.

While the dough is rising, cut twelve 4-inch squares of parchment paper for the bottom of the manapua.

To make the filling, in a small saucepan, whisk together the water, cornstarch, flour, sugar, and salt and bring to a boil over medium-high heat. Lower the heat to low and simmer for 1 minute, whisking continuously. Meanwhile, put the char siu in a bowl. Remove from the heat and pour over the char siu. Stir with a wooden spoon or toss with your hands to evenly coat the meat with the sauce.

Turn the dough out onto a clean work surface and divide it into twelve equal pieces. Transfer all but one piece back to the bowl, covering it with plastic wrap or a kitchen towel. Roll the piece of dough into a ball before flattening into a pancake with the palm of your hand. Use a rolling pin to roll the edges of the pancake out to a 5-inch round; you want the center of the dough to be a bit thicker—it should look like a little bump. This will help give the manapua a uniform thickness on the top and bottom. Add about 1⁄4 cup filling to the center of the round, then bring the edges up and around the filling, pinching them together to seal in the filling. With the seam side down and your hand in a cupping motion, gently roll the manapua into a ball with a few circular motions. Place the round ball, seam side down, on one of the precut parchment squares. Cover the ball with a clean kitchen towel and repeat until all the dough has been used. Let the dough rise for 30 minutes.

Meanwhile, bring a large pot of water to boil with the lid on. Set a steamer basket over it and lower the heat to low, keeping the water at a simmer. Place the manapua with the parchment squares in the basket, spacing them about an inch apart. If you are using a metal steamer or a glass lid, place a clean kitchen towel between the basket and the lid to capture the condensation. Steam until the buns are light and fluffy, 15 to 20 minutes; they should be touching or almost touching. Transfer to a wire rack, cover with a clean towel, and let cool for 5 to 10 minutes before serving.

Store leftovers in a ziploc bag in the refrigerator or freezer. To reheat, simply wrap in a damp paper towel and microwave for 30 seconds or resteam them in a steamer basket for 10 minutes until heated through.


char siu pork

serves 6 to 8; recipe can be halved

from alana’s aloha kitchen

ingredients

4 lbs pork butt, cut into 1 1/2” wide strips

1 tb hawaiian salt (‘alaea)

1 c (200g) packed brown sugar

1/2 c (170g) mild honey

1 1/2 tsp chinese five-spice powder

1/4 c (64g) hoisin sauce

3 tb whiskey

3/4 tsp red gel food coloring, or 1 1/2 tsp red liquid food coloring (optional)

clues

rub the pork butt strips with the salt and place in a wide rimmed pan or in a gallon-sized ziploc bag. in a small bowl, combine the brown sugar, honey, five-spice powder, hoisin, whiskey, and red food coloring for the marinade. whisk together until well combined. reserve one third in a bowl covered with plastic wrap for basting the next day. pour the remaining marinade over the pork strips and gently rub the strips with your hands to evenly coat them. cover the pan with plastic wrap or zip up the bag. transfer both the reserved marinade and the pork strips to the refrigerator overnight.

the next day, preheat the oven to 350ºF. fit a roasting pan with a rack that is at least 2 inches tall. fill the pan with a 1/4 inch of water. lay the strips over and baste with some of the reserved marinade. roast for another 20 minutes. flip all of the strips over and baste with some of the reserved marinade. roast for another 20 minutes. flip all of the strips one more time and baste again before roasting for another 20 minutes. transfer the strips to a wire rack set in a rimmed baking sheet to cool a bit. the pork can be served immediately or cooled completely before using for another recipe.


-yeh!