Chocolate Peanut Butter Oatmeal Muffins

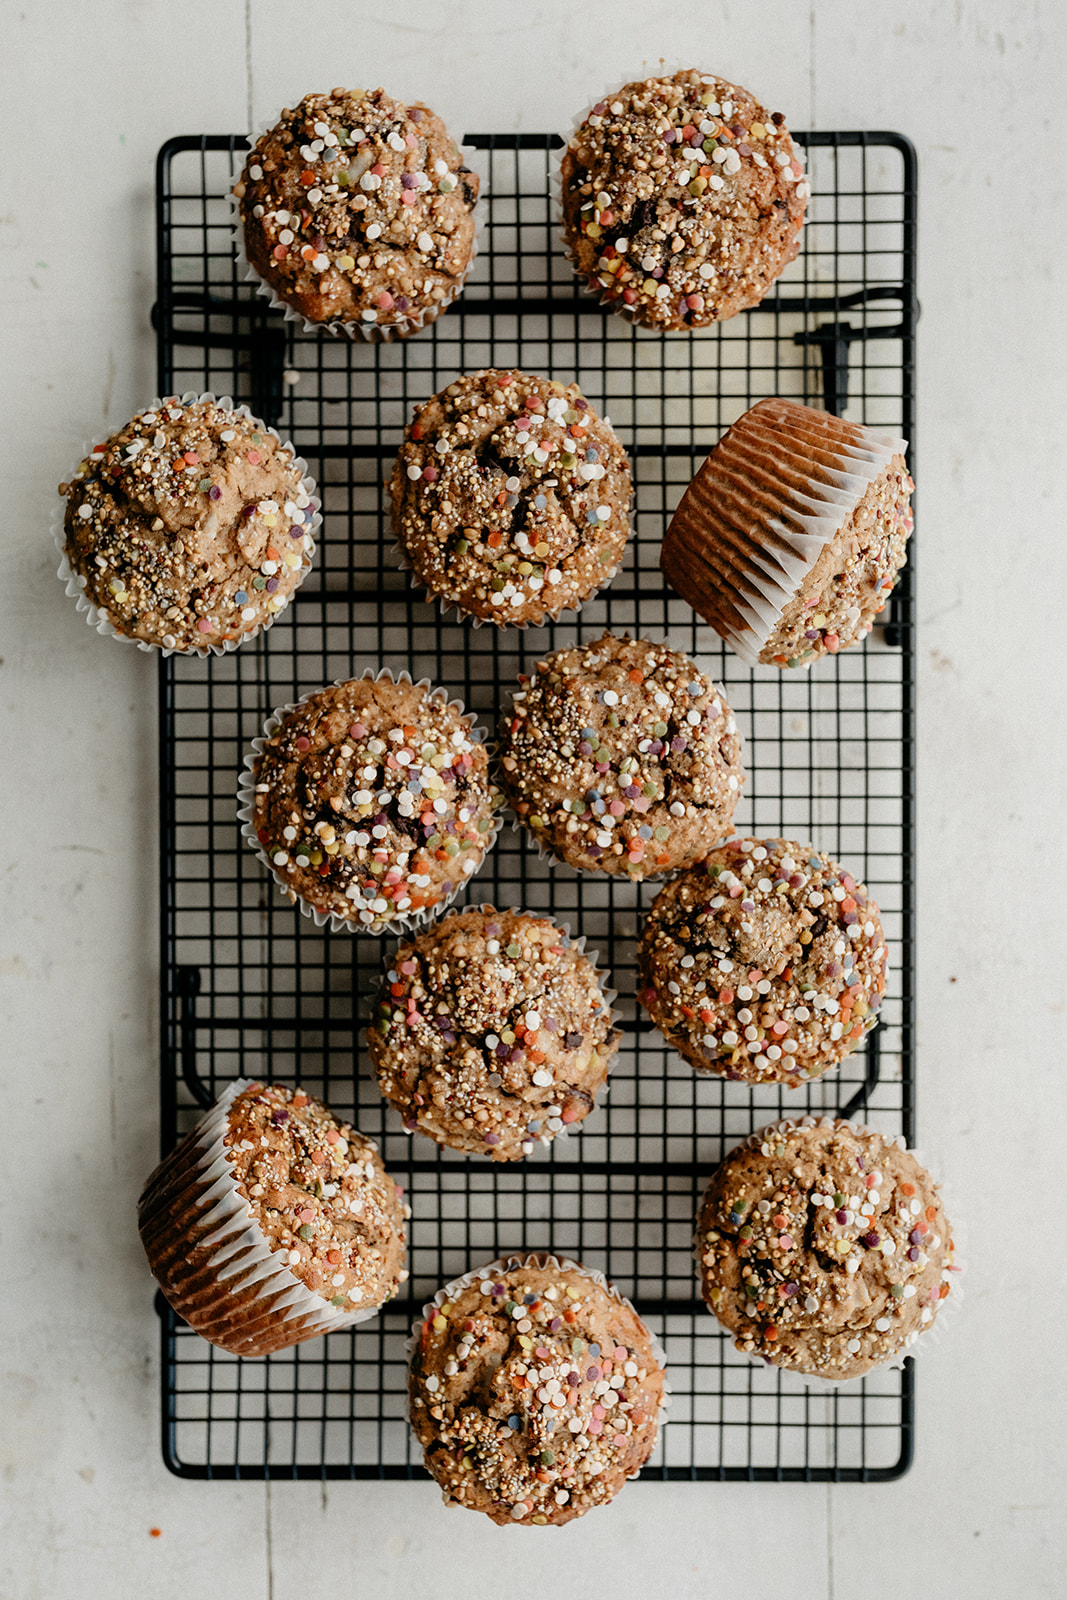
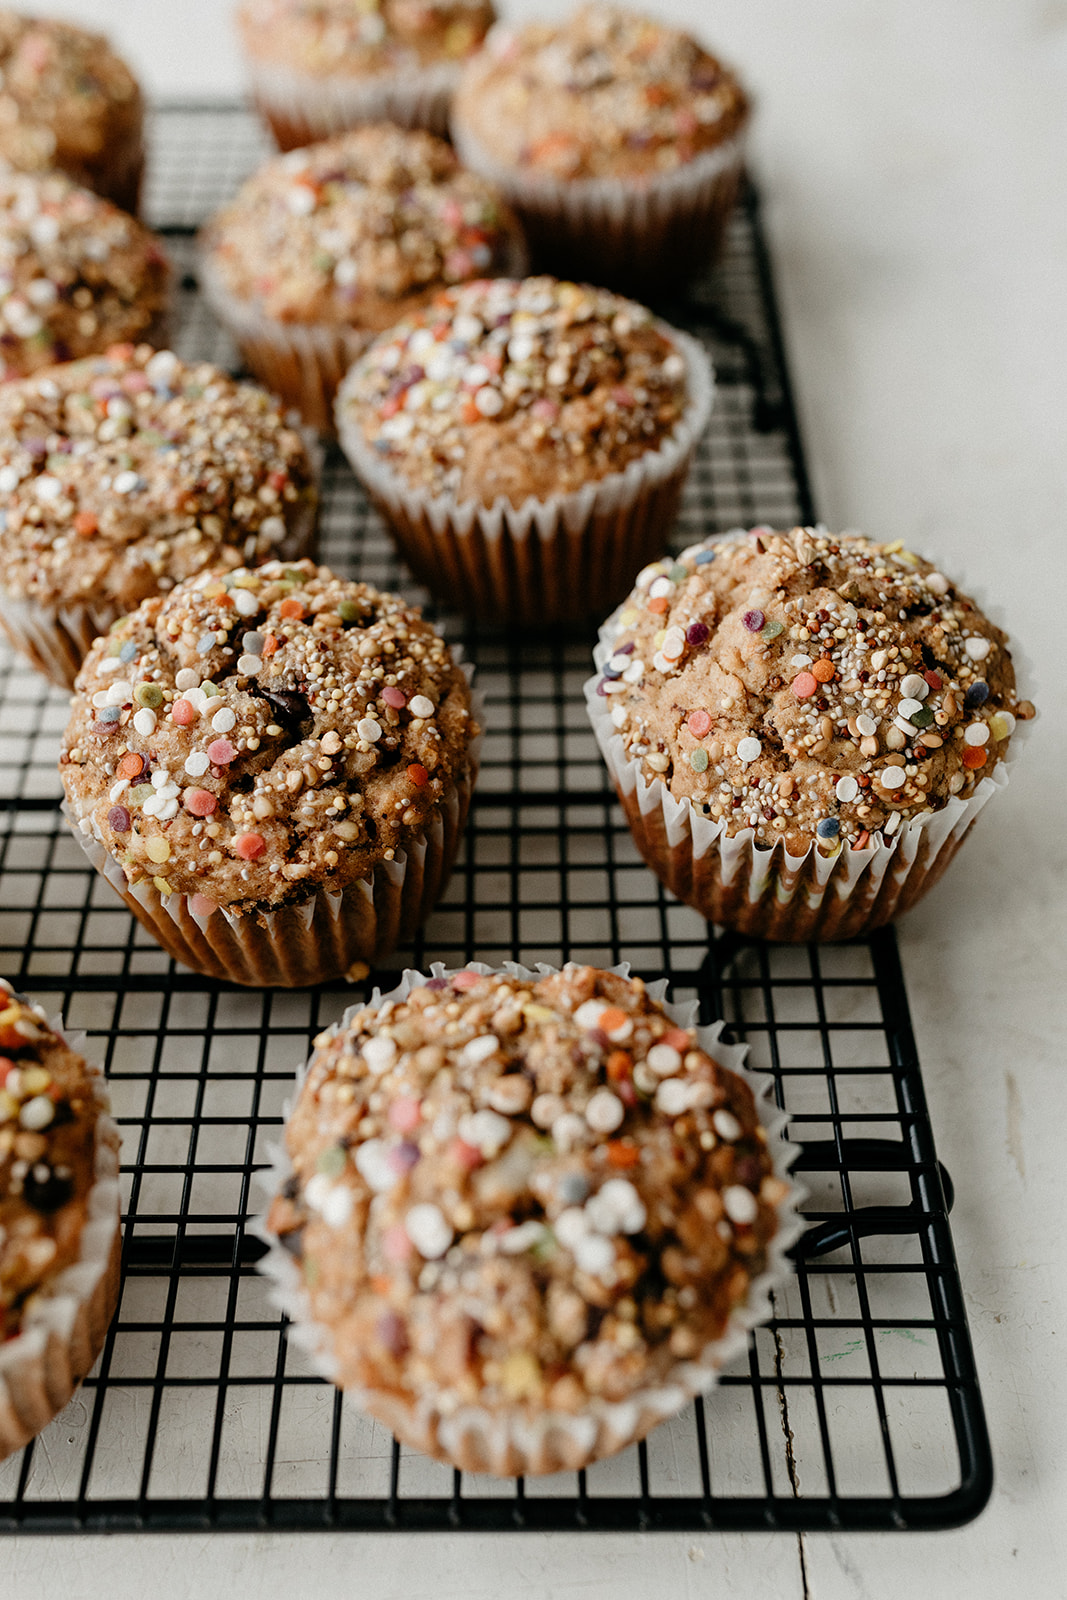
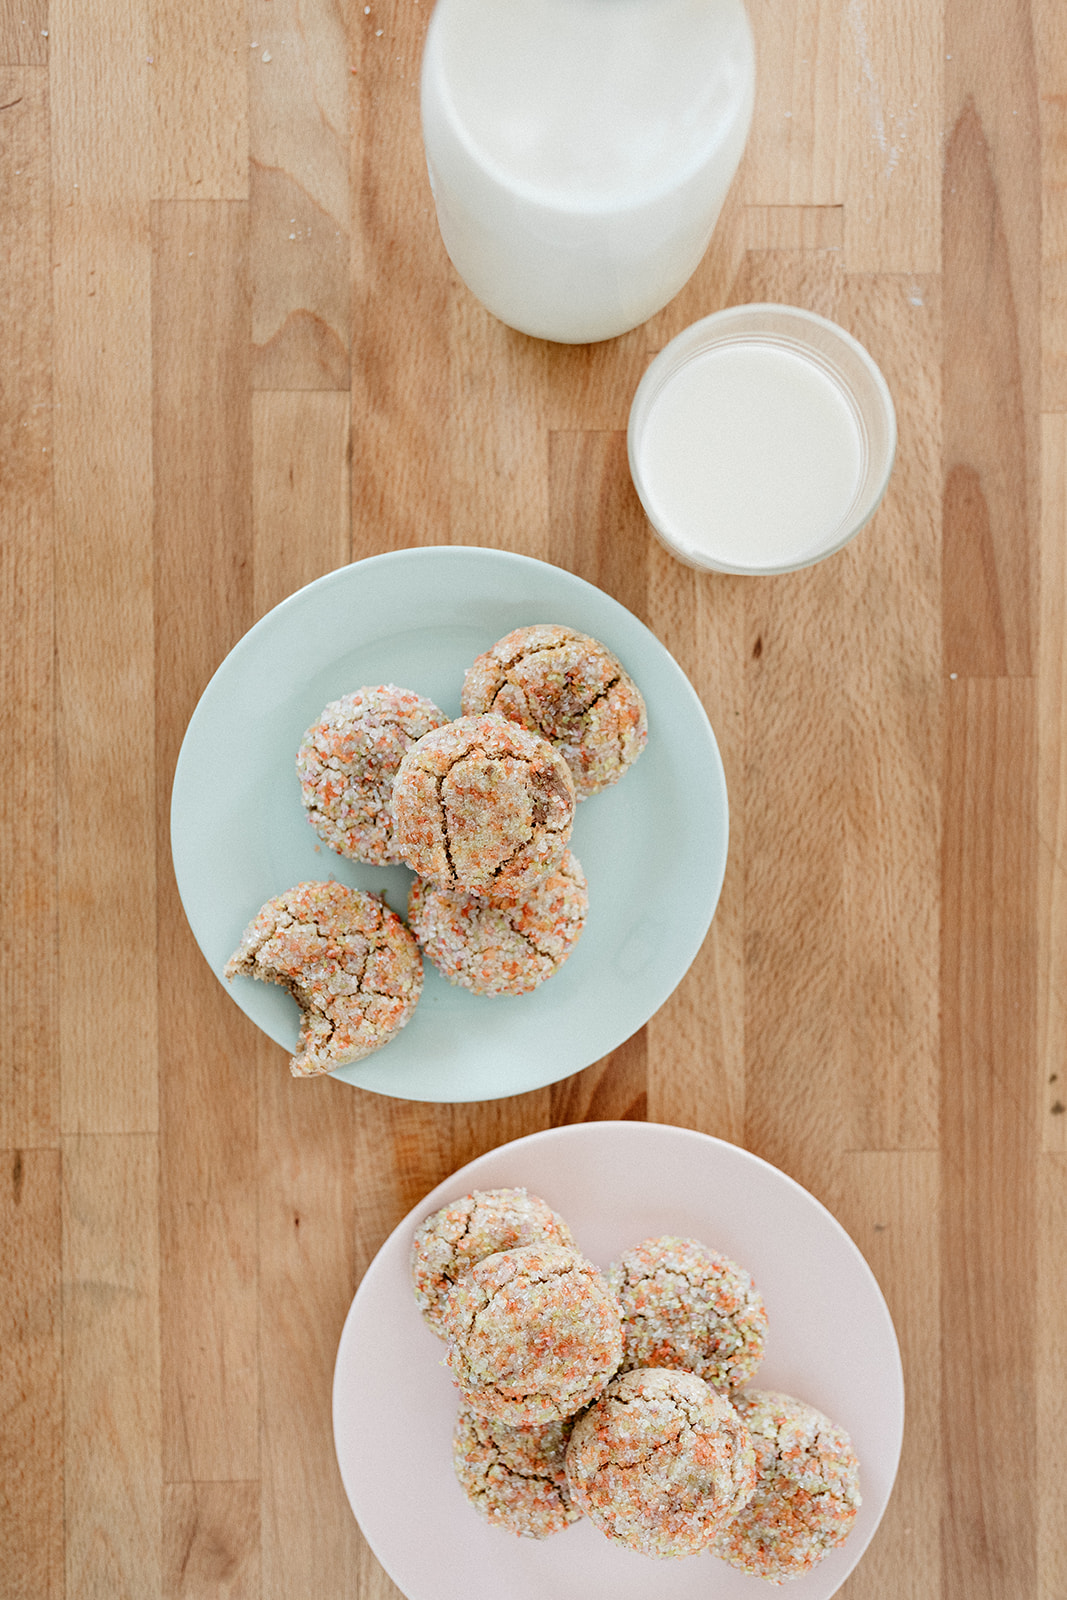
One of the number one things that I was told to prep before Bernie’s arrival was oatmeal muffins! Oatmeal to help with lactation and muffins because they’re quick and easy to thaw from frozen and you can eat them with one hand. I do love oatmeal in the morning, and I usually have it with peanut butter or almond butter, cinnamon, berries, a little dark chocolate, and Trader Joe’s crunchy super seed mix for some Omega-3s, so I made a muffin version of this! They’re super good and filling, they’ve got pockets of melty chocolate, and they’re topped with just a few sprinkles that I thought would add a little humor to times that were destined to be insane, filled with Bernie wails, and true muffin emergencies. This is a pretty versatile recipe— you can add different spices, use butter or coconut oil, and change up the nut butters and mix-ins (don’t skimp on the chocolate though!). I would definitely recommend topping them with something, whether it’s sprinkles or turbinado sugar and/or seed mix, the added crunch on top is the loveliest.

Side note: I can’t really eat these muffins without thinking about the Bojack muffin episode when Neal McBeal the Navy Seal calls dibs on muffins at the store and Bojack eats them all. I wonder how Bojack is doing these days. I’m afraid to watch it with Bernie in ear shot and all. 


Chocolate Peanut Butter Oatmeal Muffins

Makes 8 Jumbo Muffins

Ingredients

1 1/2 c (120g) rolled oats

1 c (240g) milk (2%, whole, or almond)

1/2 c (65g) all-purpose flour

1/2 c (65g) whole wheat flour or more all-purpose flour

2 tsp baking powder

1 tsp cinnamon 

1/2 tsp kosher salt

1/2 c (113g) unsalted butter or coconut oil, melted and slightly cooled

1/2 c (128g) creamy unsweetened peanut butter (almond butter works too!)

2 tsp vanilla extract

2 large eggs

1/2 c (150g) maple syrup

3/4 c (90g) dried cherries, blueberries, or raisins

3/4 c (4 oz) chopped dark chocolate

3/4 c (45g) unsweetened coconut flakes

Super seed mix, optional, for topping

Coarse sanding sugar or sprinkles, for topping

Clues

Preheat the oven to 400ºf. Line 8 jumbo muffin tins with liners and set aside.

In a medium bowl, combine the oats and milk and let soak for 20 minutes.

In a separate medium bowl, whisk together the flours, baking powder, cinnamon, and salt.

In a large bowl, whisk together the butter or coconut oil, peanut butter, vanilla, eggs, and maple syrup until smooth. Add the oats and flour mixture and stir to combine and then fold in the dried fruit, chocolate, and coconut. Scoop into muffin tins and sprinkle with seeds, if using, and sanding sugar or sprinkles. Bake until a toothpick inserted into the center comes out clean; begin checking for doneness at 22 minutes. Let cool in the pans for a few minutes and then transfer to a wire rack to cool completely or enjoy warm! 

Cooled muffins can be stored in a ziploc bag in the freezer for up to 3 months. Reheat in the microwave for about a minute.


-yeh!

Passover Chocolate Chip Cookies

Frozen cookie dough is an essential part of baby meal prep!!!! And just because Passover is around the corner doesn’t make this any different. Well, it actually kind of makes it easier because these cookies are, like, stupidly simple to make. One-bowl, three-minute simple. Remember this Passover cookie cake from a few years ago? Magic, right?! So chewy, delicious, and satisfying, and easy enough that some people asked if there was a typo and if there should have been more steps (no typo!). So these chocolate chip cookies are just hand-held versions of that cake that kind of take on a new life of their own because when they’re in this smaller shape and rolled in sugar, they get a crisp crunchy shell but stay so amazingly chewy inside. And also, you can keep this dough in the freezer and bake off only one or two cookies at a time as needed, so the convenience is real. And the flavor is awesome too, thanks to a tasty nut flour base. If you’d like to change things up and add dried fruit or M&M’s or other candy or chopped nuts, you can totally do that with these. Happy almost Passover! 


Passover Chocolate Chip Cookies

makes 12

ingredients 

1 c (112g) almond flour

1 c (112g) hazelnut flour, or 1 more cup almond flour

1/2 c (100g) lightly packed light brown sugar 

1/2 c (100g) sugar 

3/4 tsp kosher salt 

1 large egg 

1 tb vanilla extract 

1/2 tsp almond extract 

3 oz chopped chocolate or chocolate chips (any kind!)

Coarse sanding sugar or turbinado sugar

Clues

If baking immediately, preheat the oven to 350ºf. If preparing for the freezer, see below for directions. Line a baking sheet with parchment and set it aside.

In a large bowl, combine the flours, sugars, and salt. Add the egg, vanilla, and almond and stir to combine and then stir in the chocolate. The whole mixture might seem dry at first, but keep on stirring and it will come together. Roll balls that are slightly larger than golf balls and roll them in sanding sugar. Flatten them slightly and then place them on the baking sheet, 1” apart.

If baking immediately, bake for 15 minutes, until lightly browned on the bottom. Let cool slightly and enjoy! They will be super gooey when they come out of the oven but they will get chewy as they cool.

If preparing to freeze, stick the baking sheet in the freezer until the dough is frozen, about an hour or so, and then transfer to a ziploc bag. Label and freeze for up to 3 months. Bake cookies 1” apart on a baking sheet lined with parchment at 350ºf for about 20 minutes, or until lightly browned on the bottom. Let cool slightly and enjoy! They will be super gooey when they come out of the oven but they will get chewy as they cool.


-yeh!

photos by chantell and brett quernemoen

apple and peanut butter green smoothie

We had the best weekend ever in Fargo!! We were there for the first annual Fargo Hotdish Festival which was the greatest thing in the world. We ate 11 different hotdishes that were all unique and amazing. There was a spätzle hotdish, a hotdish with gigantic homemade tater tots, a hotdish with lingonberries, a kugel (!!!!), and so many other incredible interpretations that filled me right up, physically and inspirationally. We also got to Fargo in time for the Unglued Craft Fest, where I fell in love with these gnome watercolors and mind-blowing cow-to-cone gelato from Duchessa. And somehow we also found the stomach space for ramen at Slurp, knoephla at the HoDo, thick squishy toast at Youngblood, and an Ube cupcake and some gummies from Yeobo. It was delicious in every way and felt like a mini babymoon! Now I’m back and continuing to chug along with meal prep, baby prep, and recipe testing for recipes that I’m planning to post during my maternity leave and recipes that will go in the remaining episodes of season 3 of Girl Meets Farm.

This week I have a freezer friendly version of my regular breakfast routine for you! For years now I have been the biggest fan of loading up on veggies at the start of my day. It makes me feel like I’ve accomplished something first thing in the morning and like I’m ahead of the game for the rest of the day. I feel like superwoman when the rest of my meals for the day are heavy on the vegetables, which is what I always strive for, but in the event that I have a big cake testing day and end up accidentally taking too many test bites and then barely have an appetite for dinner, I feel a little bit less bad knowing that I ate at least some type of plant in the morning. In the summers when our garden is bursting, I love making breakfast salads with tomatoes, onions, cucumbers, fresh herbs, lemon, and olive oil or tahini sauce, piling them over a plop of greek yogurt, and scooping them up with toast. But when it’s not the summer, I’ve been having this here green smoothie!

This is a beginner’s green smoothie, or a green smoothie for people who in their heart of hearts would really rather be eating scrambled eggs with ketchup and extra crispy hash browns and toast with butter at Darcy’s Diner every morning, but are looking to add some reasonable nutrition without going full on brain dust. It’s made with a simple set of ingredients that I stock up on at the beginning of every week (the gigantic bag of pre-washed kale, the bulk bag of honeycrisp apples, and Smucker’s all natural peanut butter or, if I’m splurging, unsweetened almond butter). In the beginning of my green smoothie journey, a little over a year ago, I’d also add some celery, a small piece of ginger, and a few shakes of turmeric, but when I was in my first trimester and suddenly needed to simplify a lot of the flavors entering my mouth, I scaled back to the bare basics and haven’t gotten around to reintroducing these other things. I like the straightforwardness of apple and peanut butter flavor in a blanket of green. It’s sweet, nutty, creamy, and fresh! And delicious.

Also when I got pregnant and read about the increased importance of Omega-3s, I started sprinkling on Trader Joe’s super seed mix at the end which is a nice crunchy mix of flax, chia, quinoa, and a few other seeds. I’m going to call these sprinkles.

One important step that makes this smoothie (or any smoothie really) extra good is blending it into oblivion in a high powered blender. If you feel like your blender is going to launch into outer space, you’re doing it right. I use my Vitamix and blend it until it’s as smooth as possible, milky almost. Blending for too long could warm it up though, so I typically blend for the time it takes me to refill my ice tray, place it back in the freezer, and then retrieve my cups and straws. When I look in the top opening of the blender and see that it’s very smooth, I know it’s ready.

A few fun things that have made my morning routine cuter include: these pretty silicone straws, this sprinkle ice tray, my Marian cups, and the lid that I always use to cover up Eggboy’s half so I can stick it in the fridge for when he comes in for lunch. These aren’t necessary obviously but, like I said, they’re fun and cute.

I’m posting this now because I’m planning to prep a bunch of blender-ready packs for my freezer before Poppy Seed’s arrival! These are great for the freezer and make blending a breeze (assuming that baby isn’t sleeping…). Directions for freezing and blending from frozen are below.


Apple and Peanut Butter Green Smoothie

Makes 1 large or 2 small smoothies

Ingredients

1 honeycrisp apple, chopped

1 squeeze of lemon juice

2 heaping tb (40g-ish) unsweetened peanut butter or almond butter

1 oz (about 1/2 c firmly packed or a nice big handful) fresh spinach

3 oz (about 1 1/2 c firmly packed or 3 big handfuls) fresh chopped kale

6 large ice cubes

1/2 c cold water (I just stream water in from my tap for 2 seconds)

Optional additions: a few shakes of turmeric, a small chunk of ginger, 2 chopped celery stalks

Super seed mix, for topping, optional

Clues

In a high speed blender (and in this specific order), add the apple, lemon juice, peanut butter or almond butter, turmeric/ginger/celery (if using), spinach, kale, ice cubes, and water and blend on high for about the time it takes you to refill your ice cube tray and stick it back in the freezer, or until very smooth. Pour into glasses, sprinkle with super seed mix, if using, and enjoy.

To make these freezer friendly: in quart sized deli containers or quart ziploc bags, pack in the apple, lemon, peanut butter or almond butter, turmeric/ginger/celery (if using), spinach, and kale. Make a bunch at a time! Seal and freeze for up to three months. When ready to blend, add the contents to the blender along with 1 cup of water. No need to add ice. Let it sit for a few minutes so that it can defrost slightly and then use a butter knife to carefully break it up into slightly smaller chunks, just so it’s not one huge mass. Blend on high, using the tamper to help everything incorporate, until very smooth. Pour into glasses, sprinkle with super seed mix, if using, and enjoy.


-yeh!

photos by chantell and brett quernemoen

pizza bourekas

It’s been a while since we discussed pizza night recipes! Pizza night is obviously really exciting during the summer because the tomatoes and basil from the garden make every Friday a home run. In July, I got into such a great groove of sticking a pizza in the oven, running outside to the garden (or, more likely, sending Eggboy out), and yanking a few basil leaves to tear over a steamy hot margarita. Our basil did so well this year in its sunny spot in front of the house. When fall came, we transitioned to apple pizzas with apples from our trees and squash pizzas with some of the gajillion butternut squash that we grew, but my problem with those types of flavors that straddle the line between savory and sweet is that I love them sooooo much for about two days and then I immediately get sick of them and I can’t think about them for another year. 

So after the garden had truly died, we fell into kind of a janky pizza phase: a few weeks ago I was dead set on trying that place in town that college kids go to exclusively after 2am, at one point I got a frozen cauliflower pizza, and two weeks ago there was the five course dive bar pizza tasting experience. They were all awesome. But like awesome in the way that spray can cheese is awesome…????

I figured that all of this pre-made pizza could have meant that I was in a pizza making rut, so rather than continuing to mourn the loss of my basil plant, I decided to shake things up and make pizza bourekas. Bourekas!! I love bourekas. Bourekas are pastry pockets that can be filled with pretty much anything, the most common of which have potatoes or cheese. I first fell in love with them at the Levinsky market in Tel Aviv, and they’re originally from the Balkans (they’re related to this Borek). With store-bought puff pastry, they’re not too difficult to make, and with pizza fillings they are just plain addictive. Cheesy sauciness in a buttery flaky pastry? Oh yes yes yes. They’re just as great hot out of the oven as they are cold out of the fridge the next morning for breakfast, which is the sign of a solid pizza situation. You can add any of your favorite pizza toppings, these days I’m into mini pepperoni, which I am hereby calling “meat sprinkles.”

…Slowly backs away…

And I’m using ingredients from one of my favorite grocery brands, Our Family! If you’re from North Dakota or Michigan, you know (and love) Our Family from seeing them in almost every section of the grocery store. I use their ingredients all the time because they’re reliable and the name just makes me smile. The culinary team for Girl Meets Farm also loves Our Family because their label is really easy to greek, but my North Dakota friends still recognized it! Which made me really happy. Thanks so much for sponsoring this post, Our Family


Pizza Bourekas

Makes 6

Ingredients

4 oz Our Family shredded mozzarella

6 oz Our Family whole milk or part skim ricotta

2 large eggs

2 tb all purpose flour, plus more for dusting

A good pinch of Kosher salt

Black pepper

A pinch of dried oregano

1 sheet puff pastry, thawed

6 tb (94g) pizza sauce, plus more for serving

Additional toppings as desired: chopped peppers, onions, mini pepperoni, sausage, etc.

Crushed red pepper, for topping

Clues

Line a baking sheet with parchment and set aside.

In a large bowl, combine the mozzarella, ricotta, 1 of the eggs, flour, salt, a few turns of pepper, and oregano.

On a work surface lightly dusted with flour, roll the puff pastry out to 10” x 15”. If it gets sticky, you can dust with more flour as needed. Cut the pastry into 6 squares and transfer to the baking sheet. Place a dollop of the cheese mixture into one of the corners of each square, leaving a 3/4” border (see photo above for reference). Create a well in the center of the cheese mixture and add a spoonful of sauce. Sprinkle with additional desired toppings. Beat the remaining egg with a splash of water to make an egg wash and brush the edges of the pastry with it. Fold the pastry over and press to seal well, using a fork to pinch the edges. Repeat with remaining pastry squares. Brush the tops with egg wash and sprinkle with crushed red pepper. 

Refrigerate for 30 minutes. Meanwhile, preheat the oven to 375ºf. 

Bake until golden brown; begin checking for doneness at 30 minutes. (It’s alright if some of them break open at the seams while baking, it’s part of their rustic charm.) Let cool slightly and then serve warm with additional pizza sauce for dunking. Leftovers can be stored in the refrigerator and are great cold the next morning for breakfast! You can also prepare a whole batch a day or two in advance, store them in the fridge, and reheat them for a few minutes in a 325ºf oven before serving. 

-yeh!

Thank you, Our Family, for sponsoring this post

Photos by Chantell and Brett Quernemoen